One day a message popped up on my WhatsApp from Adri, a collector from Spain. He had a Casio CGW-500 Cosmophase that meant a lot to him. It was a keepsake from his father, and he wanted to give it the care it deserved. The watch itself still ran well and kept good time, but the crystal was scratched and the steel bracelet, which was not original, had taken a beating over the years. Adri first thought about swapping the bracelet out completely, but after we talked it through, we decided to restore the watch as a single, refreshed piece instead.
I put together a full proposal for him: ultrasonic cleaning, scratch removal and polishing on the case, bracelet and crystal, a check of the polarizing film, and new spring bars. Adri shipped the watch over by DHL, and once it arrived we got to work. We were both heading off on holiday soon after, so we made a point of getting everything done early. No collector likes leaving a watch in limbo over a vacation. 😅
What made this one special was the story behind it. A father-to-son piece always carries weight, and the CGW-500 Cosmophase is a characterful little watch in its own right. It is exactly the kind of vintage Casio that collectors love to see brought back to life. 😄
What Did the Watch Look Like When It Arrived?
Technically, the CGW-500 Cosmophase was in good shape. It ran, kept time, and the module did its job. The problems were all about wear and grime, which is exactly what you expect from a watch that has lived a full life on someone’s wrist.
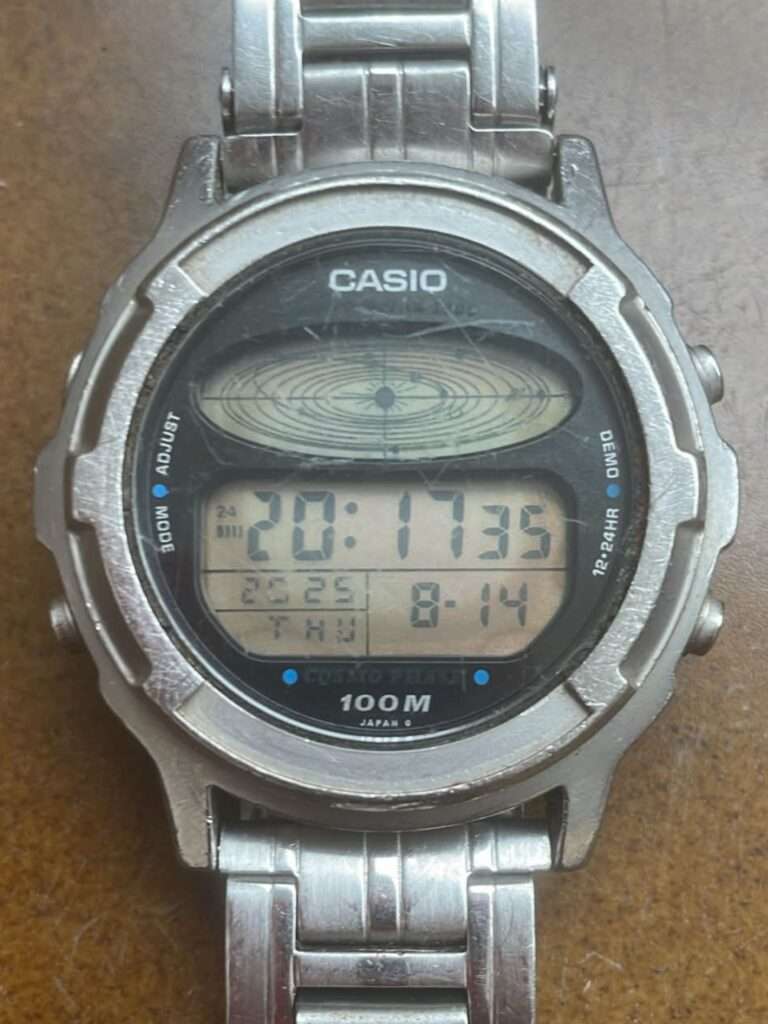
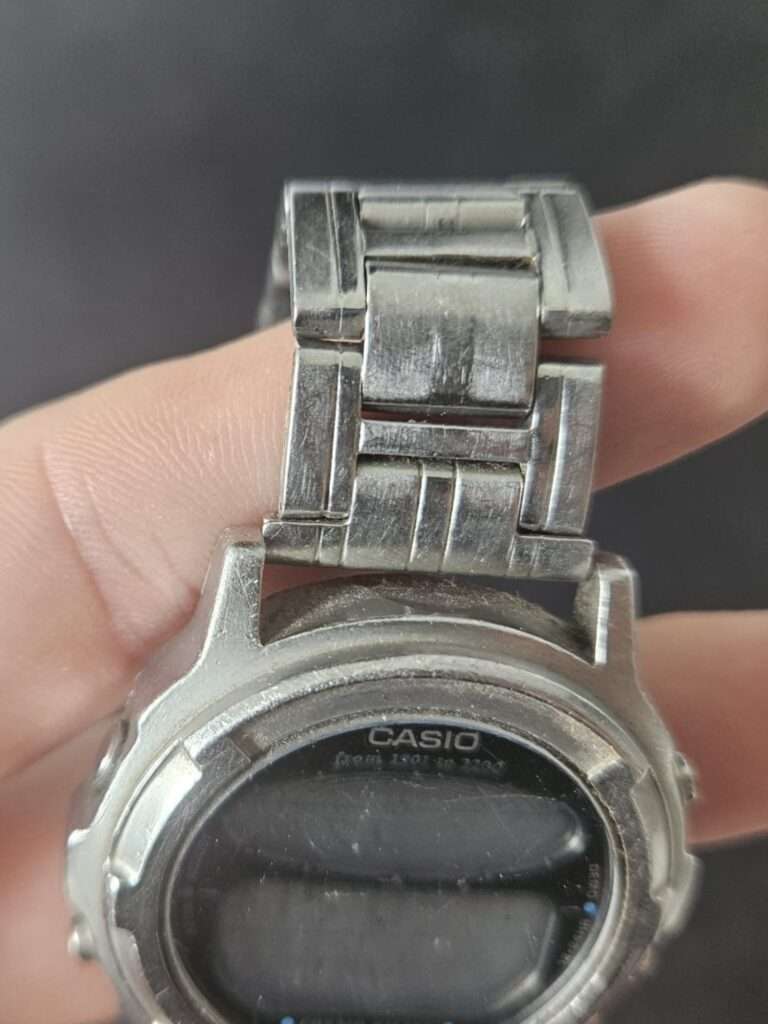
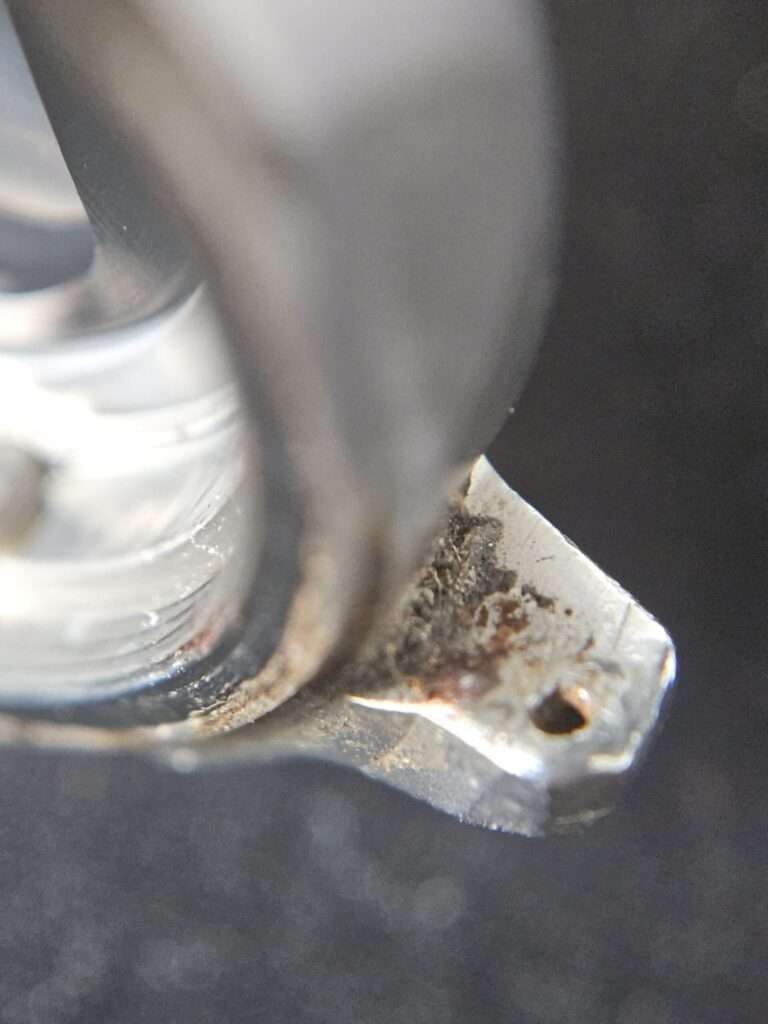
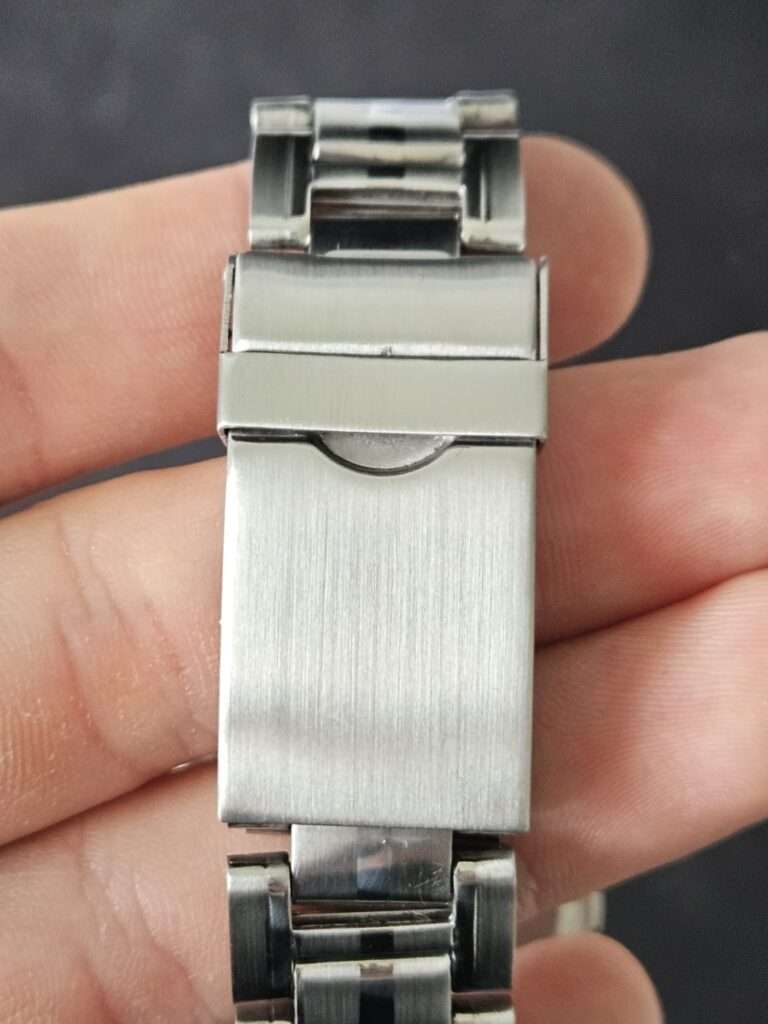
The mineral crystal was the first thing I noticed. It was covered in scratches, including some deep ones that caught the light from every angle. The case carried plenty of heavy scratches too, and the steel bracelet was in the same state. The bracelet was not original, but Adri wanted to keep it, so we agreed to restore it rather than swap it out. Even the clasp had picked up its share of scratches over the years.
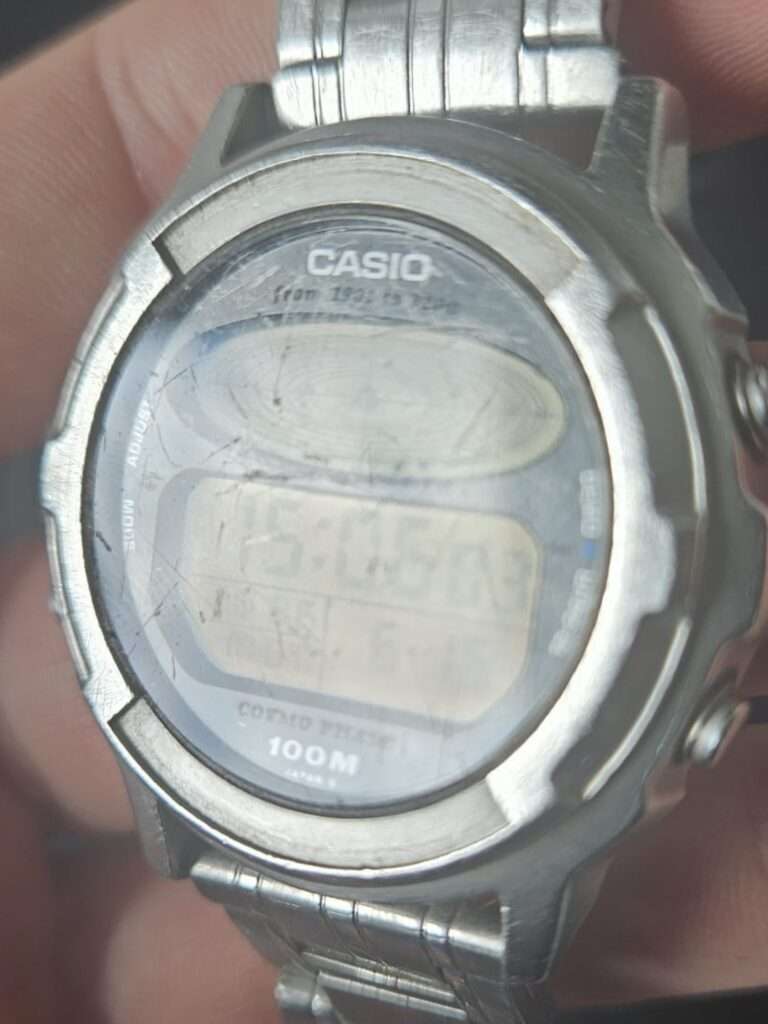
The real surprise came once I opened the case and pulled the module. The inside of the glass had a greasy film on it, most likely silicone from the gasket that had broken down over time and crept inside. That film was the reason the display looked foggy and was almost impossible to read, like staring through mist. On top of that, every little corner and gap was packed with dirt. The buttons had collected so much grime that they would barely press in.
So this was a watch that worked fine on paper but looked and felt tired in person. A proper teardown, a deep clean, and a lot of polishing were the only way forward. 🛠️
Casio CGW-500 – Restoration Process
With the watch fully assessed, I planned the work from the inside out. The module and the glass needed attention first, then the case and bracelet, then the crystal, and finally a deep clean before reassembly. Here is how it went.
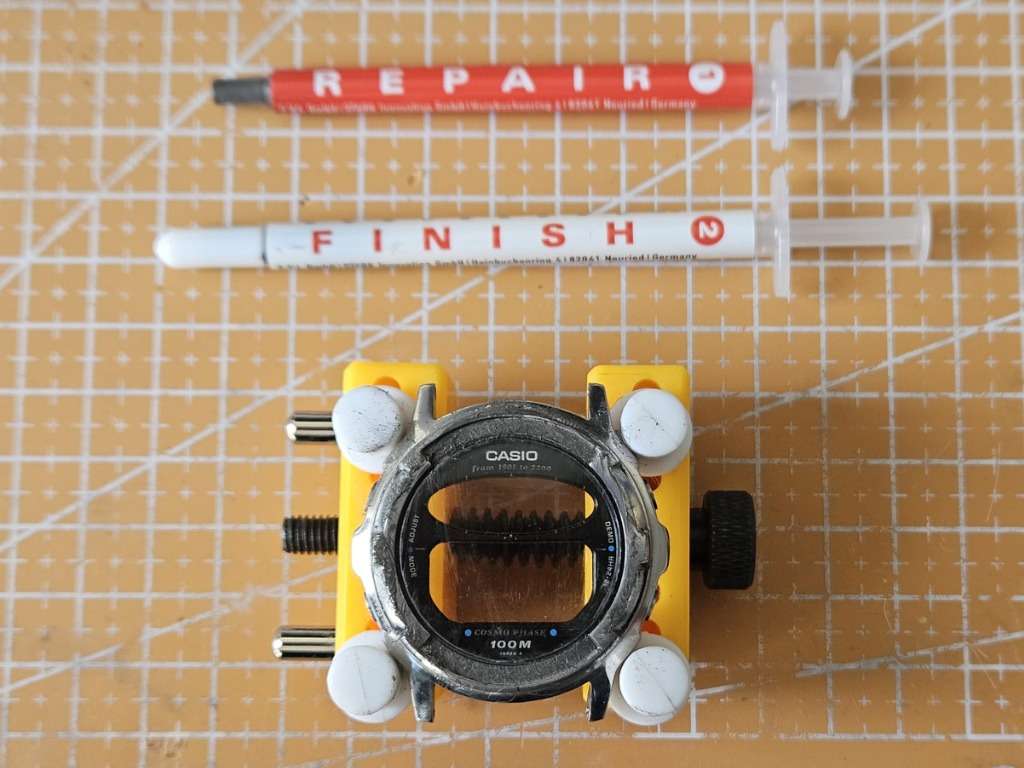
Step 1: Opening the Case and the First Cleaning
I started by opening the caseback and removing the module. This is where I found the real culprit behind the foggy display. The inside of the glass had a greasy film on it, most likely silicone from the gasket that had broken down over the years and worked its way inside. I cleaned the film off the inner surface of the crystal with IPA alcohol, which cut through the residue without leaving streaks. With that gone, the display was readable again instead of looking like it was behind mist.
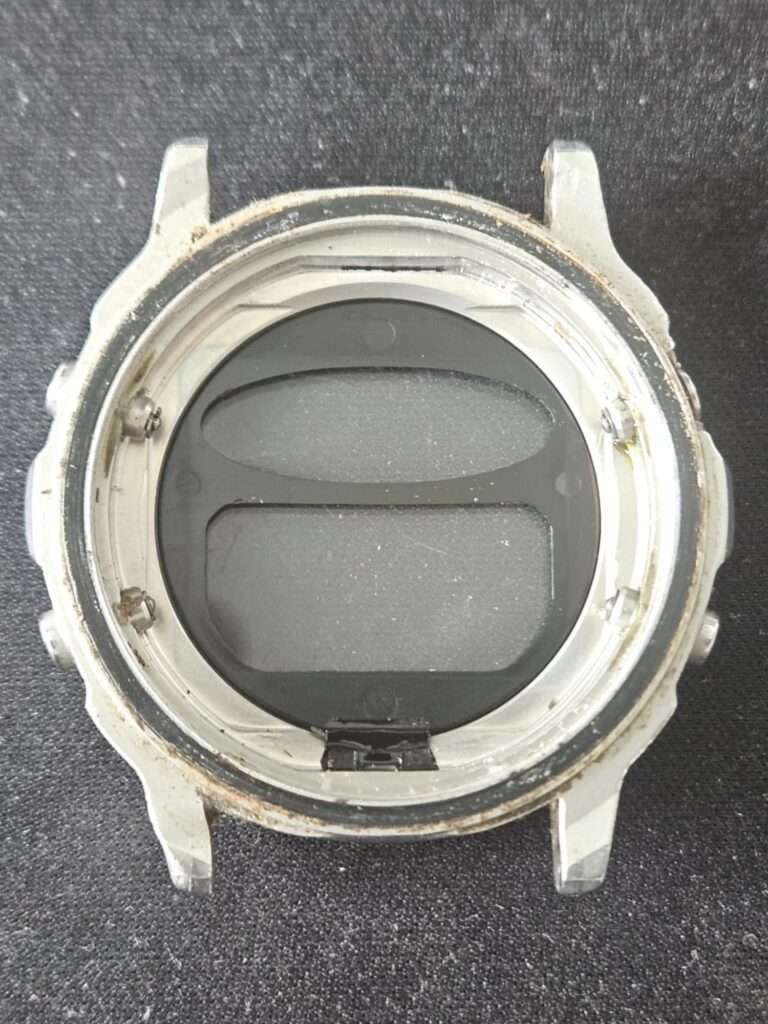
Next I dealt with the dirt. Every corner and gap was packed with grime, and the buttons had collected so much of it that they would barely press in. I cleaned out each recess and worked the dirt out from around the pushers until they moved freely again. It is amazing how much a few decades of pocket lint and dust can jam up a watch. 😅
Step 2: Polishing the Case and Bracelet
With the watch stripped down, I moved on to the metal. Both the case and the bracelet had heavy scratches, so this was a full grit progression done with a hand grinder and sanding discs made for this kind of work. I started at 360 grit to cut the deep scratches, then worked through the full ladder: 400, 600, 800, 1000, 1200, 1500, 2000, 2500, 3000, 4000, 5000, and finally 10000. Each step removes the marks left by the one before it, so skipping grits just leaves you chasing scratches you cannot see until the end.
After the sanding, I finished on a felt wheel loaded with block metal polishing paste, then went over everything with Polywatch to clear the last micro-scratches. The steel came back to a clean, even shine.

Step 3: Recreating the Bracelet’s Brushed-and-Polished Pattern
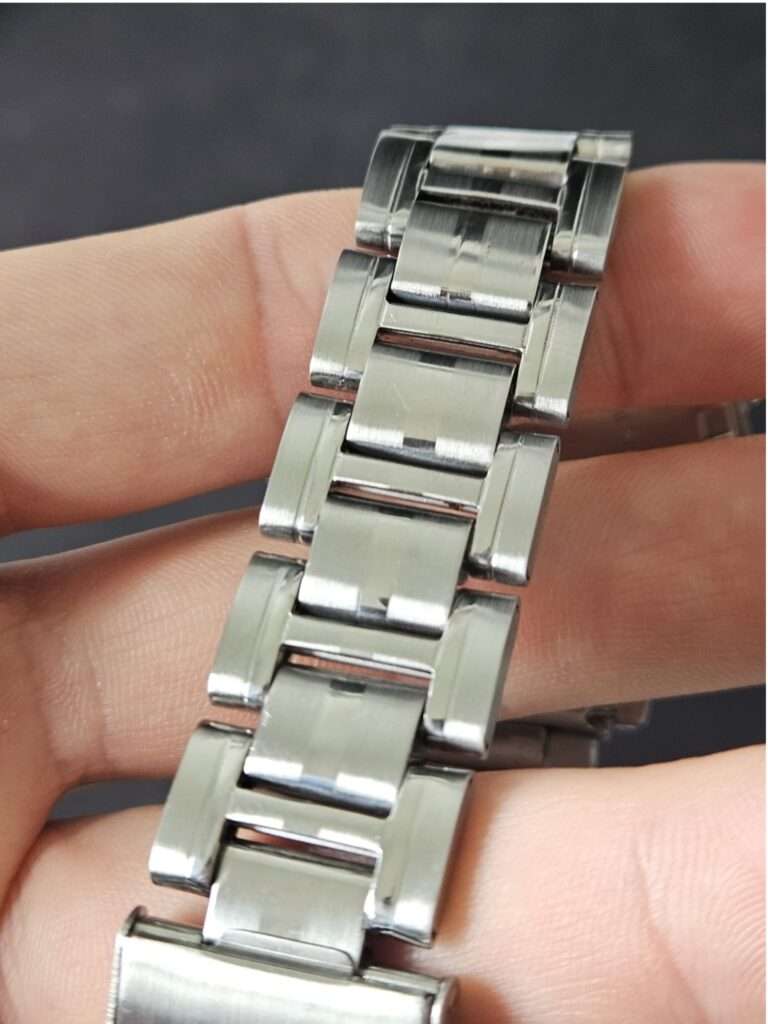
The bracelet was not just plain steel. Its original look had 3 polished stripes running along it, with the rest of the surface in satin. After all that polishing, the whole bracelet was shiny, so I had to rebuild that contrast.
The trick was simple but effective. I masked the three stripes that needed to stay glossy with copper tape, then went over the exposed areas with an abrasive pad, the non-woven kind, to lay down a satin finish. When I peeled the tape off, the masked stripes kept their shine and everything around them read satin, just like the factory pattern. A low-tech method with a result that looks exactly right.
Step 4: Polishing the Mineral Crystal
This was the slow one. The crystal turned out to be mineral, not acrylic, which matters a lot. Mineral glass is much harder and far more stubborn to work than acrylic, so you cannot just rub some Polywatch on it and call it done. For deep scratches like these, you have to grind.
I had saved a very good guide for exactly this situation, a thread on r/casiovintage about polishing deeply scratched mineral glass, and I followed it closely.
I ordered Polywatch Mineral Glass for the job. First I masked the area around the crystal with copper tape so I would not damage the case while sanding. Then came the long, tedious part: sanding with wet-and-dry paper starting at a very low 240 grit and stepping up gradually to around 2000 to 3000. Starting that low is necessary because the glass is so hard and the scratches were deep. Without it, you simply cannot remove them.
After the sanding, I switched to the paste, first the repair paste to polish out the haze, then the finish paste for the final clarity. The result was striking for mineral glass. I will be honest though: it is still not perfect. At certain angles you can spot a couple of faint scratches. But compared to where it started, it is night and day. 💎
Step 5: Replacing the Polarizing Film
To bring the display back to full contrast, I replaced the polarizing film on the screen. A fresh film makes the digits crisp and dark again instead of washed out, and it is one of those small parts that makes a huge difference in how readable a vintage display looks.
Step 6: Final Ultrasonic Cleaning and Reassembly
To finish, I gave the bracelet, the whole case, and the caseback an ultrasonic clean in water with a little dish soap. This pulls out any polishing residue and the last traces of grime from spots a cloth can never reach. Once everything was clean and dry, I put the module back, reassembled the watch, and it was ready to go home.
Final Result
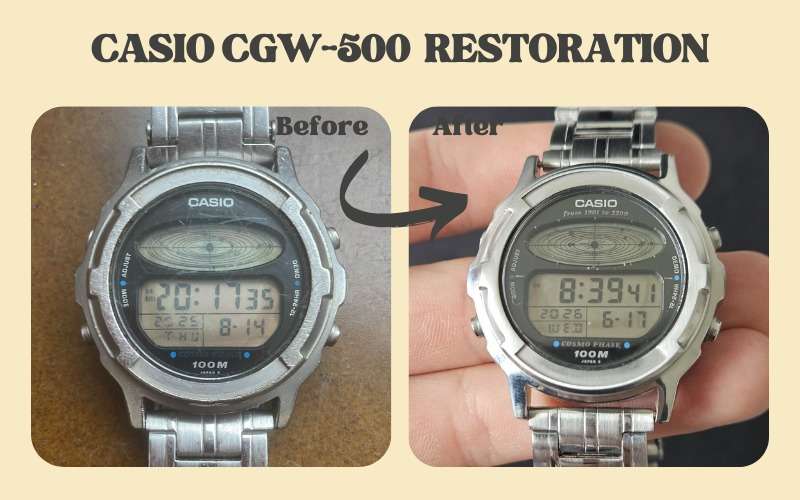
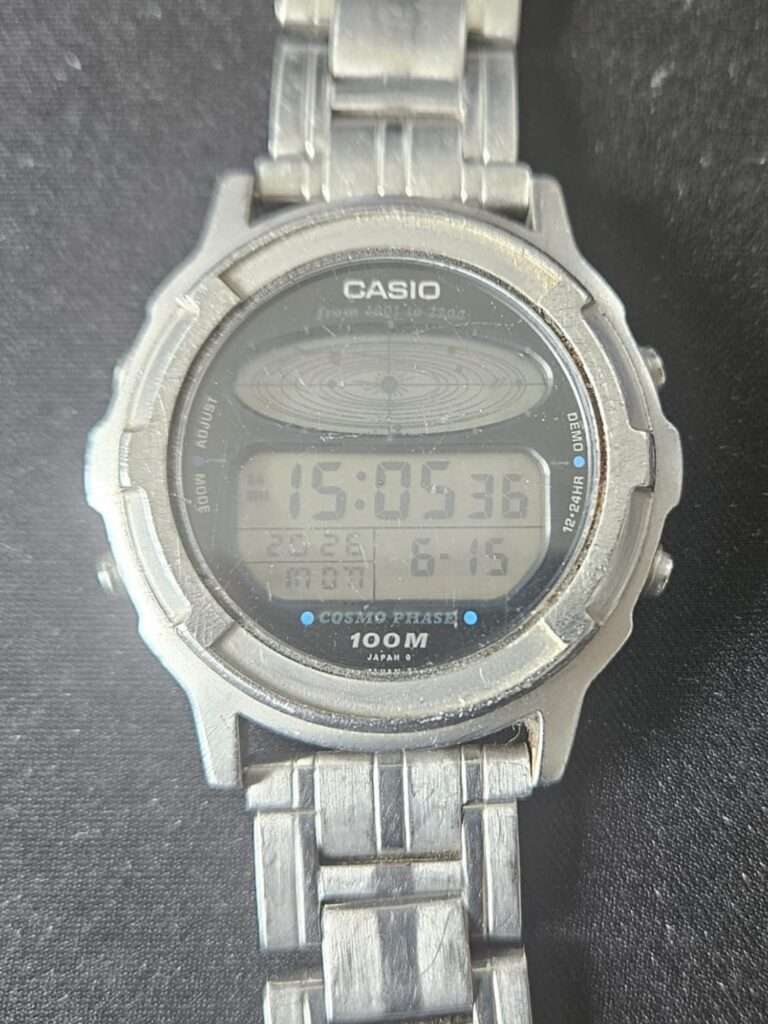
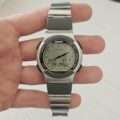
After all that work, the CGW-500 Cosmophase came back to life. The case and bracelet had a clean, even finish again, with the satin-and-polished stripe pattern restored just the way it left the factory. The crystal was clear instead of foggy, and the display read sharp and dark again thanks to the fresh polarizing film. The inside was spotless, the buttons pressed properly, and that little planetary Cosmophase animation was easy to see again. For a watch that arrived tired and grimy, the transformation was a real treat. ⌚
I want to be honest about one limitation. The alarm and signal still work, but the sound is quiet now. That is simply the buzzer showing its age, and there is nothing that can be done about it. A small quirk on a watch that is otherwise running and looking great.
Adri was thrilled when he saw the photos. His words were “better than I expected,” which is always the best thing to hear when the watch is a family keepsake.
Want Your Vintage Casio Restored?
This Casio CGW-500 Cosmophase is one example of the restorations I do. I restore vintage Casio watches for collectors and enthusiasts around the world, everything from straightforward cleanups to more complex repairs like polishing deeply scratched mineral glass and rebuilding a bracelet’s satin-and-polished finish.


You can see more of my previous projects here: 👉 casiorestore.com/projects-restorations
I work mainly with collectors across Europe and shipping is not a problem. I have already completed restorations for collectors from the UK, Scotland, Sweden, Ireland, Spain, France, and more. That said, sometimes logistics from outside Europe can be worked out too, it just takes a bit of creativity. 😄 Every project is discussed individually, so we always agree on the scope and price before starting. 🛠️
The process is simple:
- Write to me on Instagram: @vintage.casio.restore
- Or send me an email: vintagecasiorestore@gmail.com
- Describe the problem with your watch, send clear photos, and tell me your country.
If your vintage Casio deserves a second life, I will be happy to help. 👍

Daniel is the person behind Vintage Casio Restore, a project dedicated to restoring and documenting vintage Casio digital watches from the 80s and 90s. Based in Poland, he combines technical precision with a passion for retro design, bringing forgotten models back to life and sharing their stories online.Outside the workshop, Daniel works in a digital agency, managing SEO and content strategy for technology clients, blending his professional experience with his love for classic tech and design.
Leave a Reply