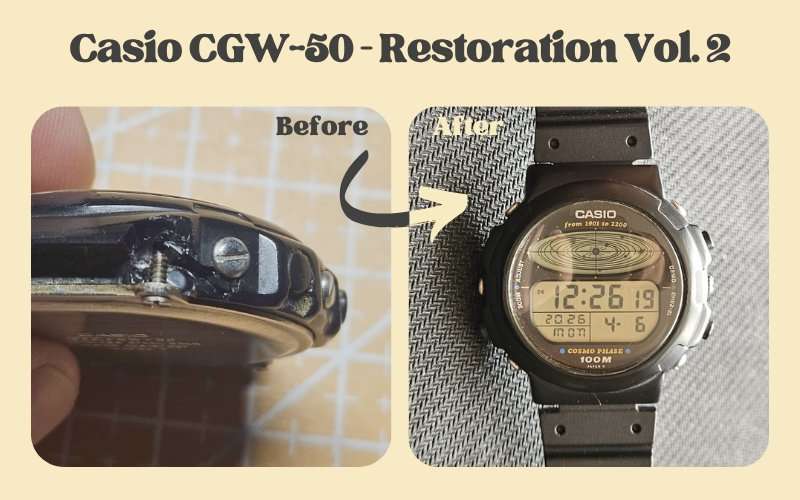
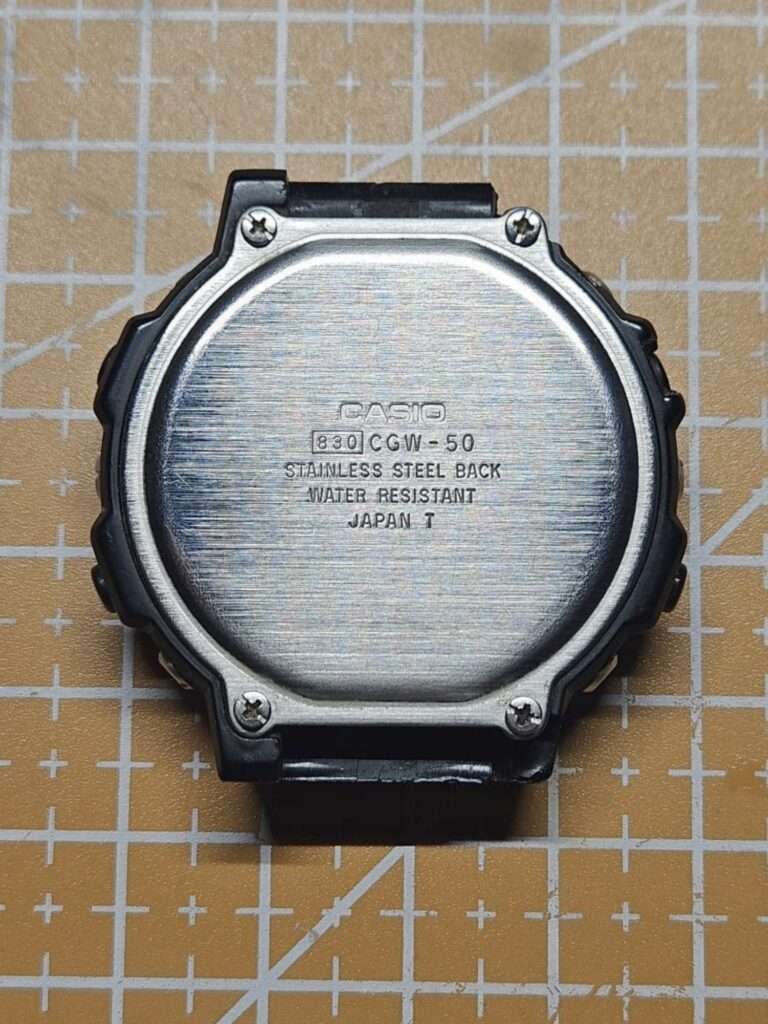
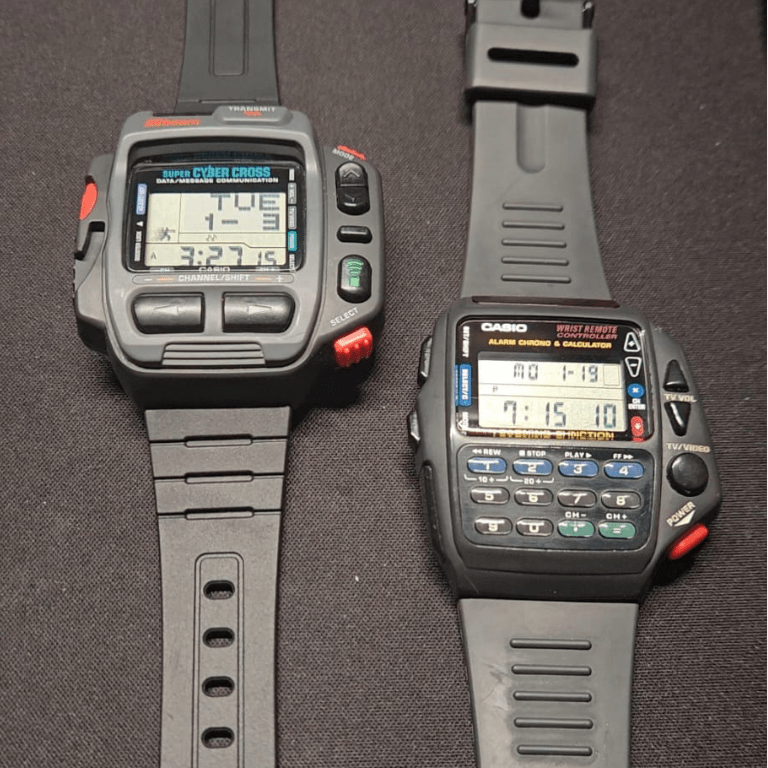
One day I got an email from Michele. He wrote from Italy about a Casio CGW-50 “Cosmo Phase” (Module 830) that needed help. The module was running perfectly. The display was in excellent condition. But the exterior told a different stor, two broken lugs and a scratched case and crystal. He’d been following the blog for a while and wanted to know if I could bring it back.
We sorted the details over email. A little while later, a package arrived from Italy and landed on my workbench.
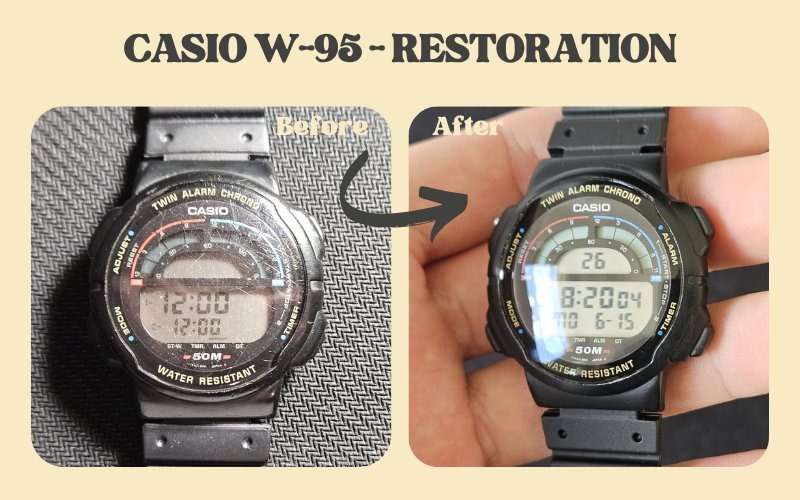
If you’ve been here before, you might recognise this model. I restored a CGW-50 once already, you can read that one here:
This time, the watch came from a client. And this time, the damage was significantly worse.
What Did the Watch Look Like When It Arrived?
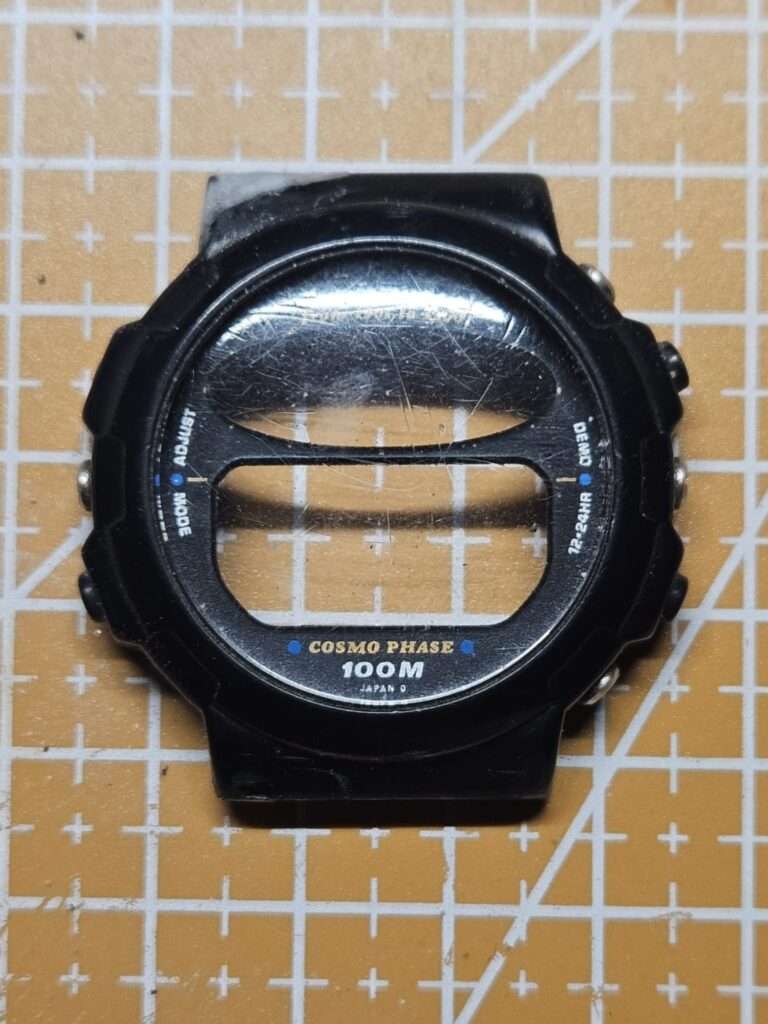
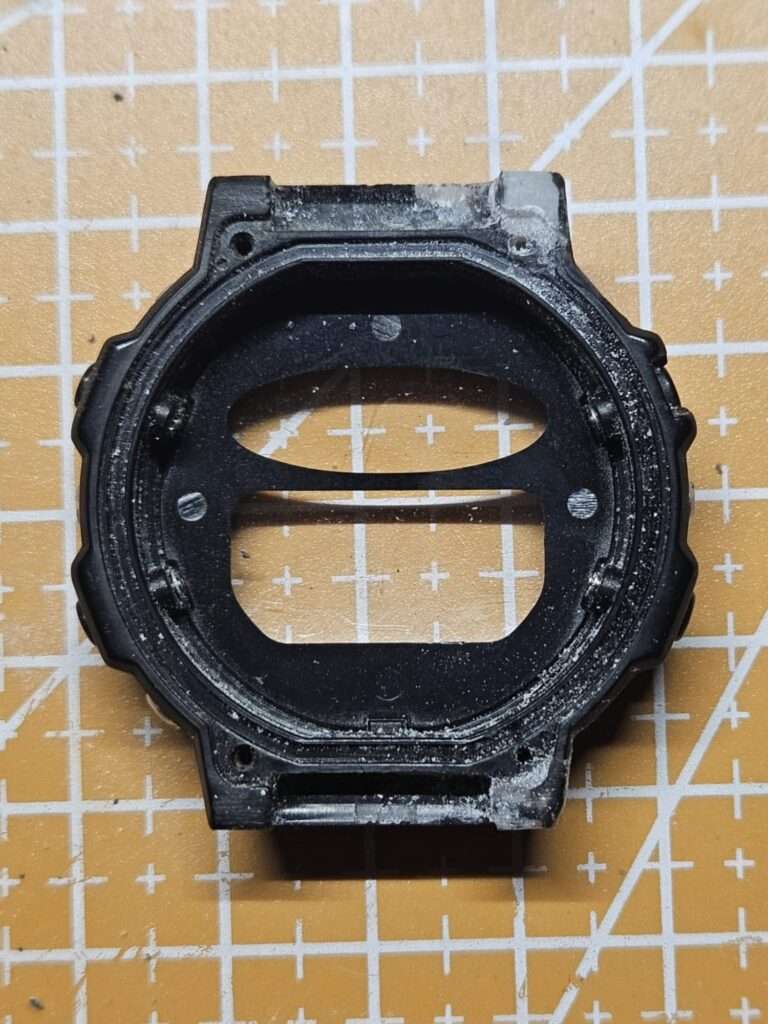
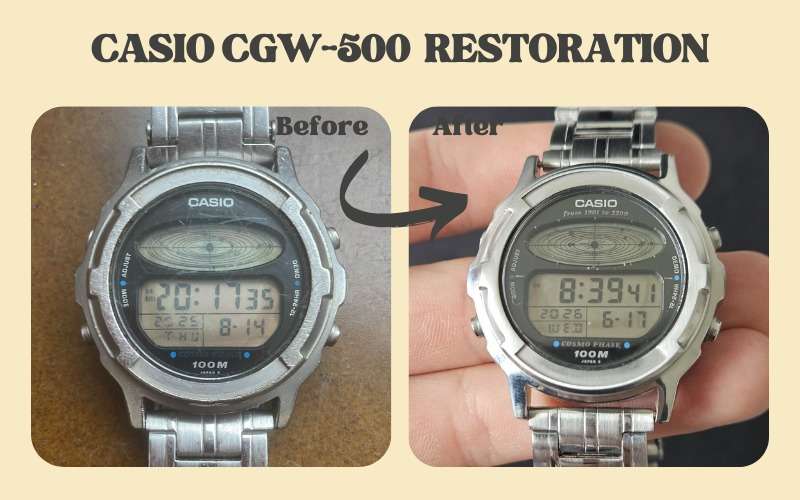
The CGW-50 arrived with two broken lugs. Not chipped, not cracked, broken. Both lugs where the strap attaches had snapped off, and the damage reached all the way to the edge of the back cover screw holes. That’s the danger zone. Once the break goes that deep, it starts affecting the area under the gasket and the back cover seal. At that point, a lot of restorers would walk away.
I looked at the photos Michele sent before agreeing to take the job. It was on the edge. But after a closer look, I decided it was salvageable, and once the watch arrived in person, I confirmed it. Difficult, yes. Impossible, no.
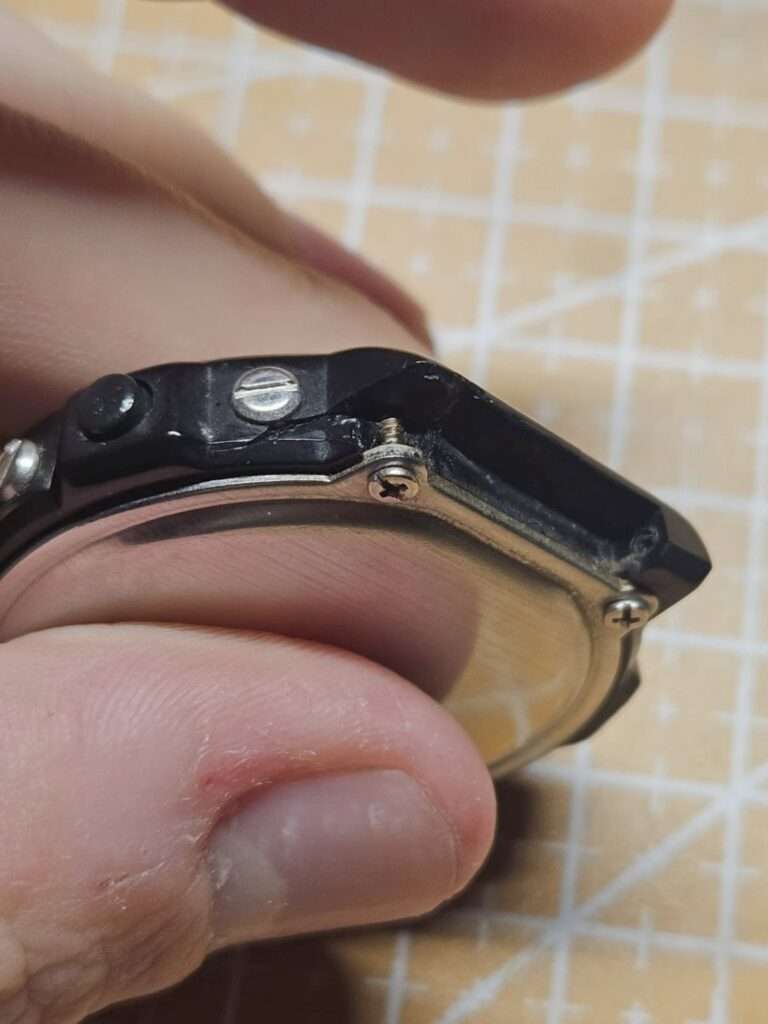
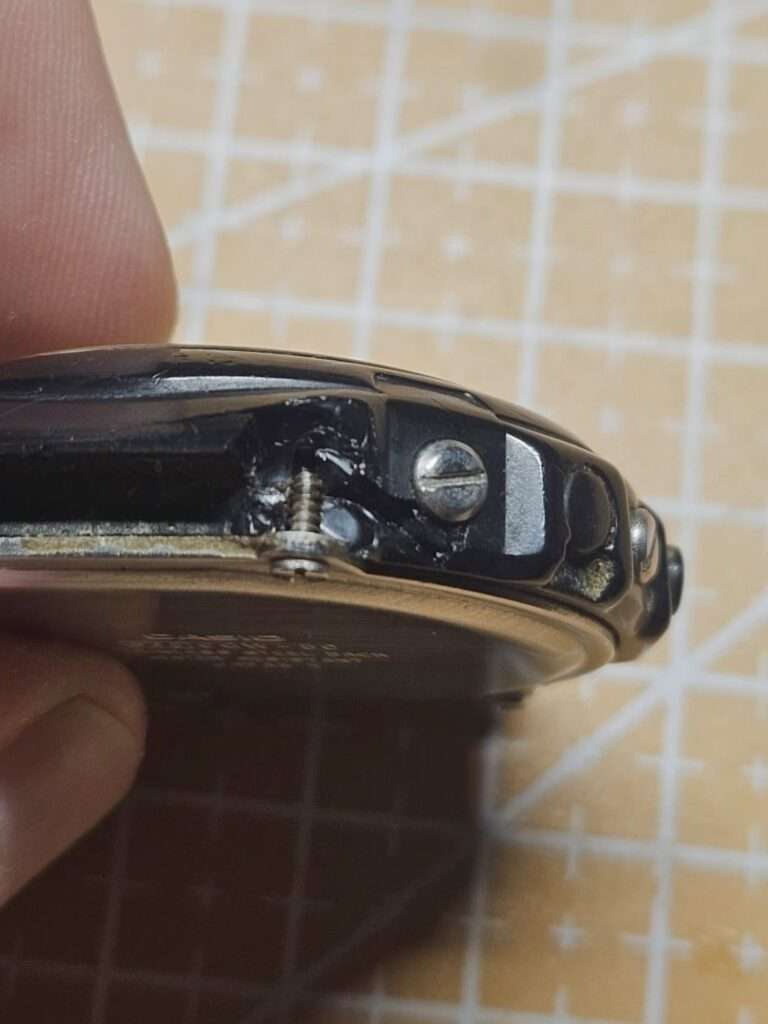
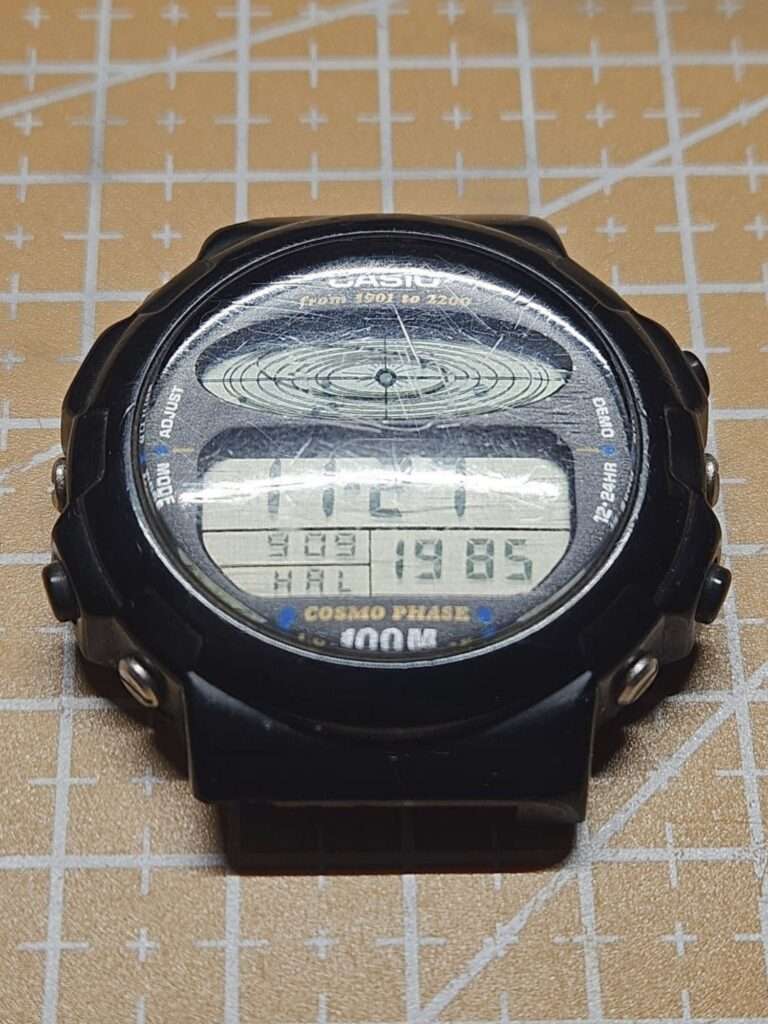
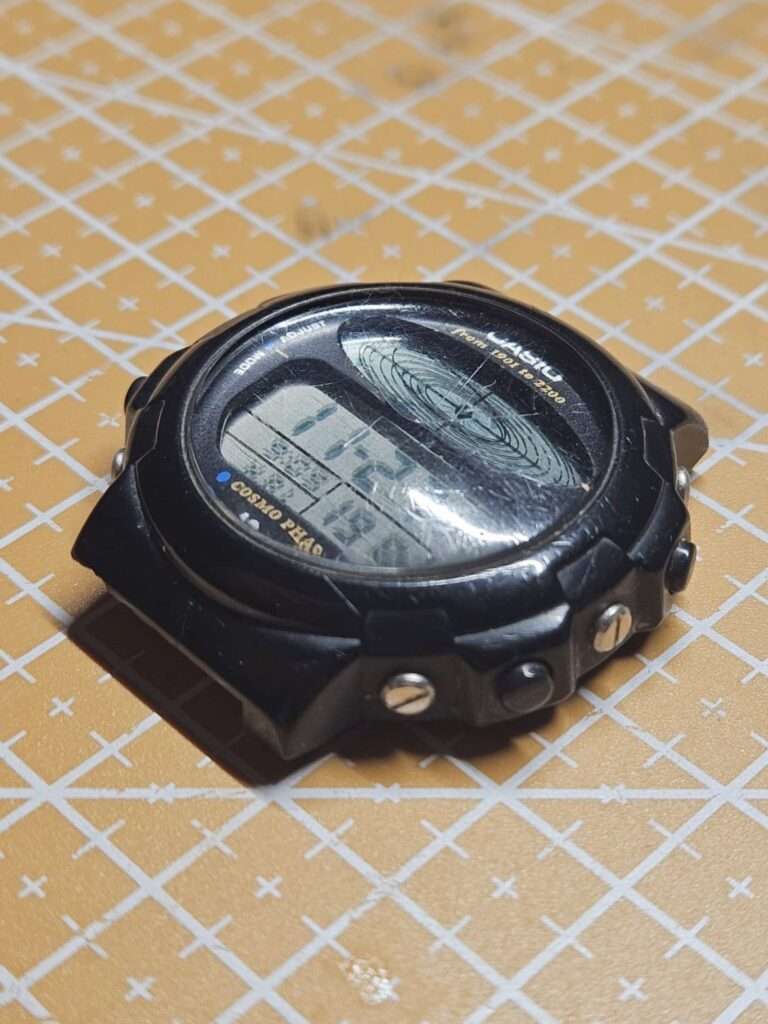
The crystal was scratched too. Not light surface wear, deep scratches, the kind that take real work to remove. The case had similar marks from years of use.
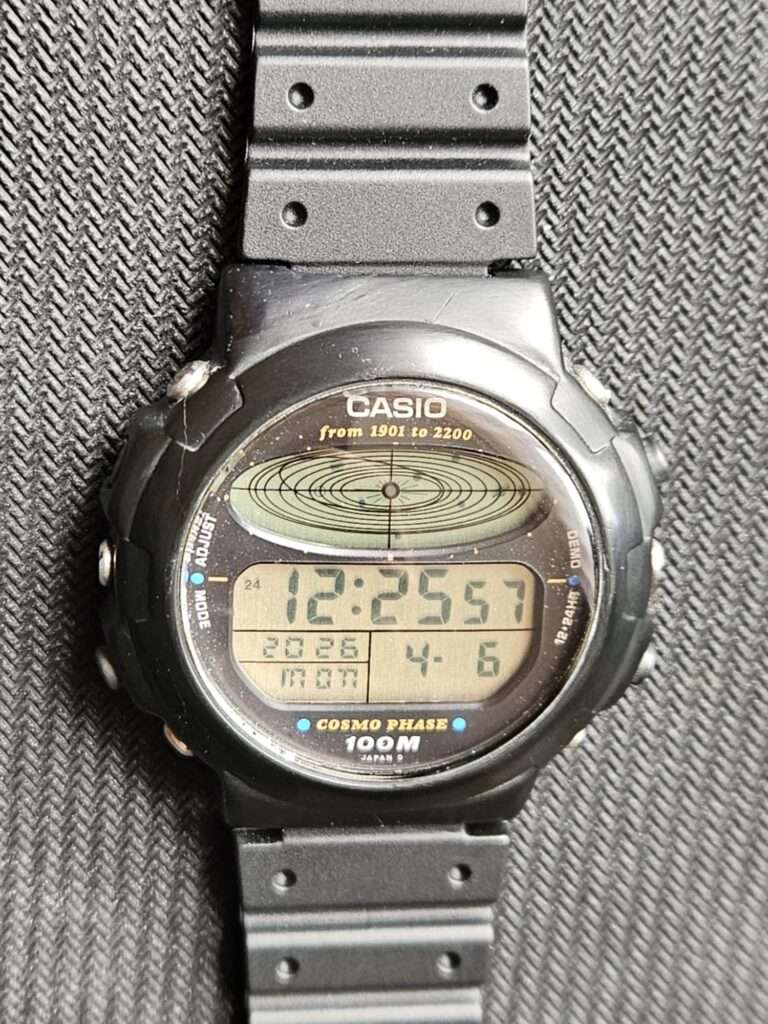
The good news: the module was alive. Display perfect, moon phase tracking correctly, all functions working. Michele had taken good care of the internals. The CGW-50 just needed its exterior brought back to match. 🔧
The Restoration Process
Step 1: Lug Reconstruction ×2
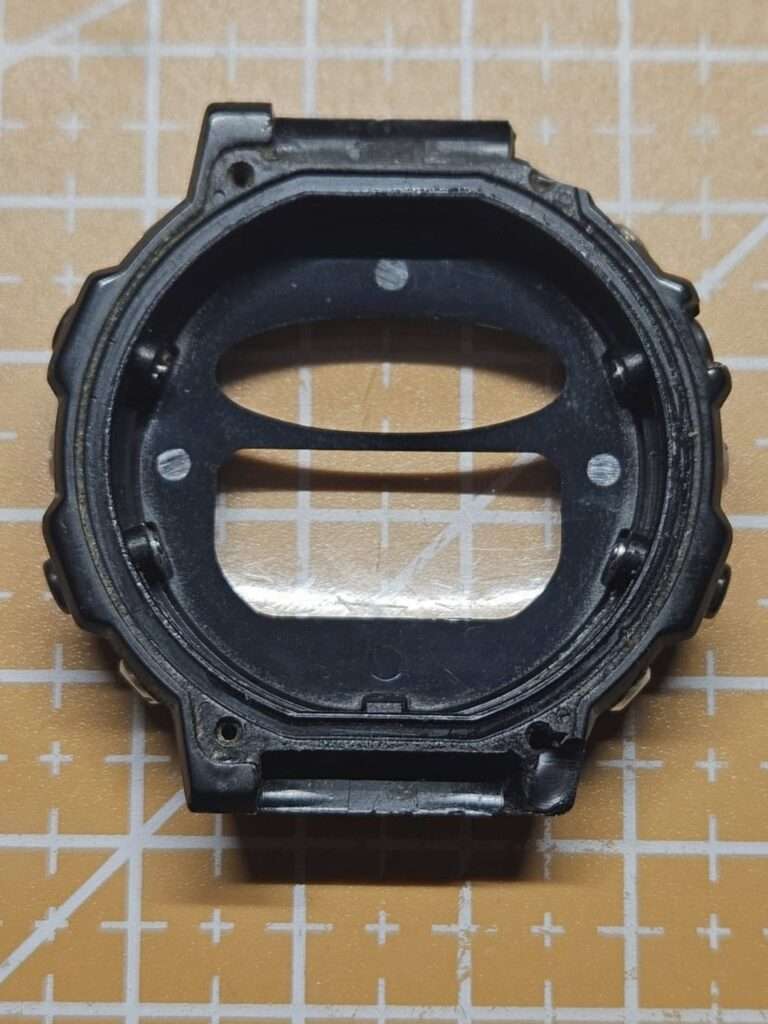
The lugs were the biggest challenge of this project. Both were broken down to the screw hole area of the back cover, deep into the structure of the case. This is the kind of damage where one wrong move can make things worse, so I took it slow.
I used my standard method: baking soda and super glue. The process is simple in theory but requires patience in practice. I built the material up gradually, layer by layer, letting each application set before adding the next. No rushing. The goal is to recreate the original lug profile as closely as possible, which means a lot of small additions rather than one big fill.
Once I had enough material, I moved to shaping. I sanded the rebuilt lugs down to match the original profile, then drilled the spring bar holes. Clean, centred, functional.
With the shape done, I painted the rebuilt sections with black nail varnish. It sounds unconventional, and it is, but it works well on resin cases and matches the texture better than most alternatives. I left it for two days to fully cure.
After curing, I lightly sanded the surface to even it out. There was quite a bit of excess material, so the finish isn’t perfectly invisible up close. If you look carefully, you can tell. At this level of damage, that’s the honest reality, the lugs are solid and functional.
Step 2: Crystal Polishing
The scratches on the acrylic crystal were deep. Not the kind you can fix with a quick polish, these needed proper wet sanding from the bottom up.
I started at 800 grit and worked my way up to 7000 grit, wet throughout. For the deepest scratches, I used the super glue method: tiny droplets applied with a thin pin, filling the grooves, then sanded flush with the crystal surface once set. It’s a slow process but it handles the kind of damage that polishing alone can’t reach.
Once the sanding was done, I finished with Polywatch paste and a felt pad. The crystal came out clear. 👍
Step 3: Case Finishing
The case followed the same sanding process as the crystal, but I stopped at 2500 grit. Going higher on a matte resin case would start pulling it towards a shine, which would look wrong.
To bring back the factory matte finish, I used a white magic eraser, both damp and dry. This is the step that ties everything together. Done right, it leaves a consistent, even matte surface that matches the original texture closely.
Step 4: Seals & Reassembly
With the exterior done, I moved inside. I re-siliconed the button seals and replaced the main case back gasket. The module was technically fine, so reassembly was straightforward, no surprises.
Step 5: Strap
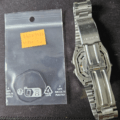
Michele wanted a matching strap as part of the project. The original 14mm resin strap for the CGW-50, and similar models like the TGW and STR, is hard to find. I tracked down a replacement that looks close to the original and still has decent quality. There were only a handful left on Amazon, so I ordered one for Michele and a few extra for backup.
I fitted the strap, did a final check, and the CGW-50 was ready.
The Final Result
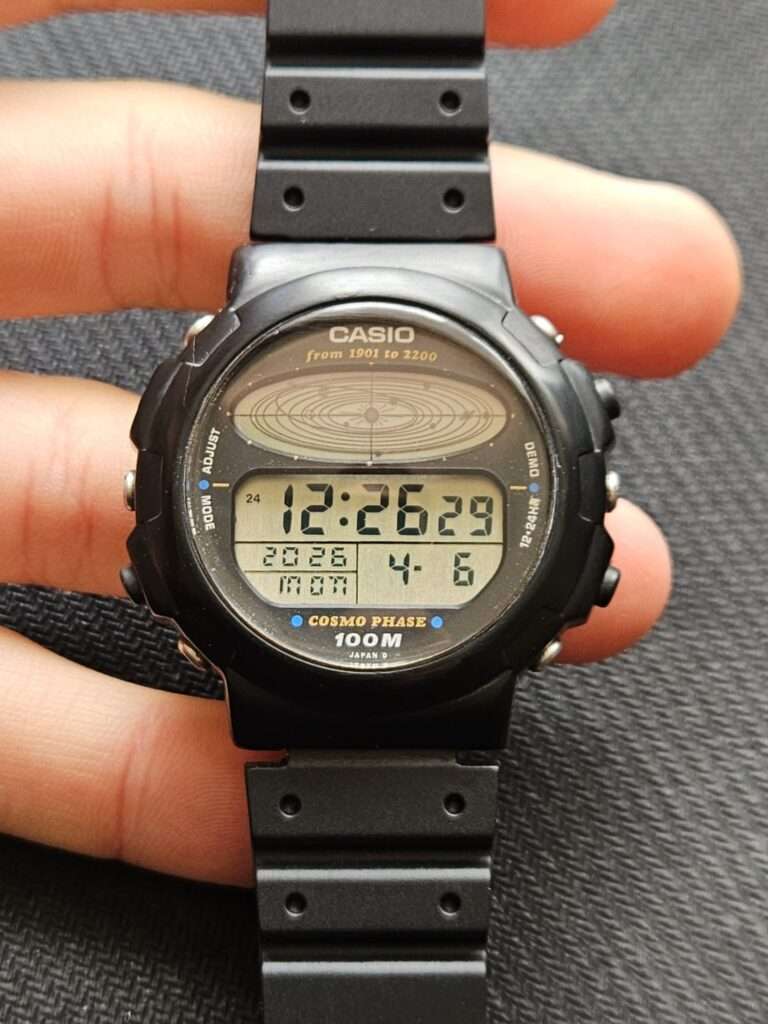
The CGW-50 came out well. Really well, especially considering what it looked like when it arrived.
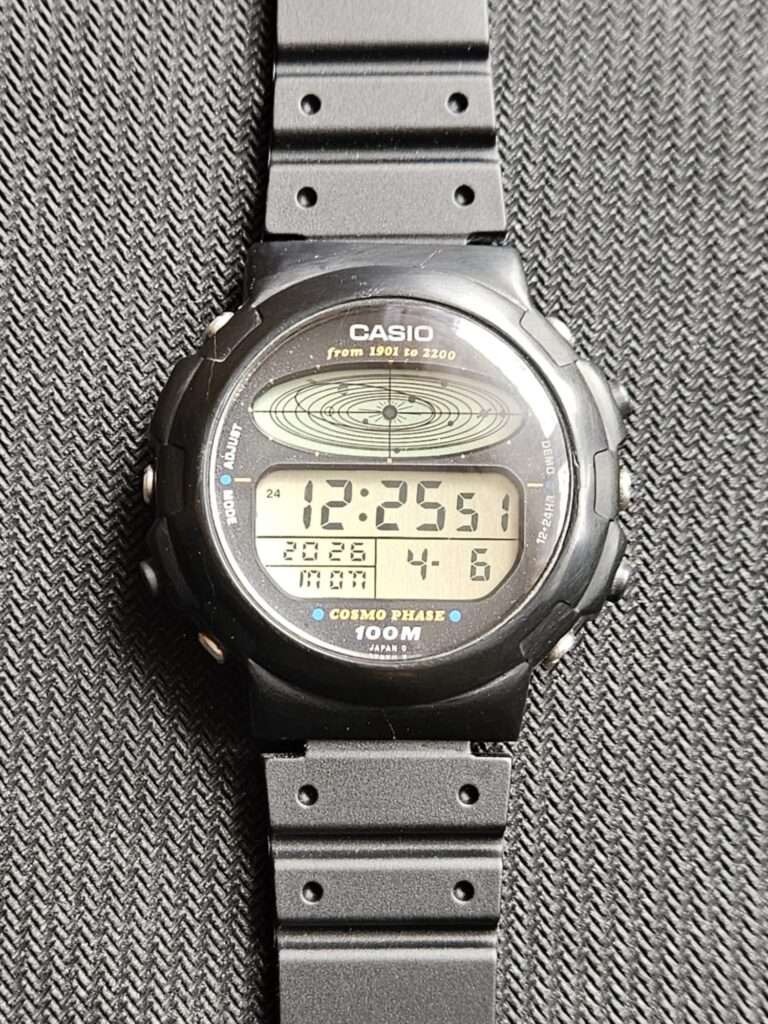
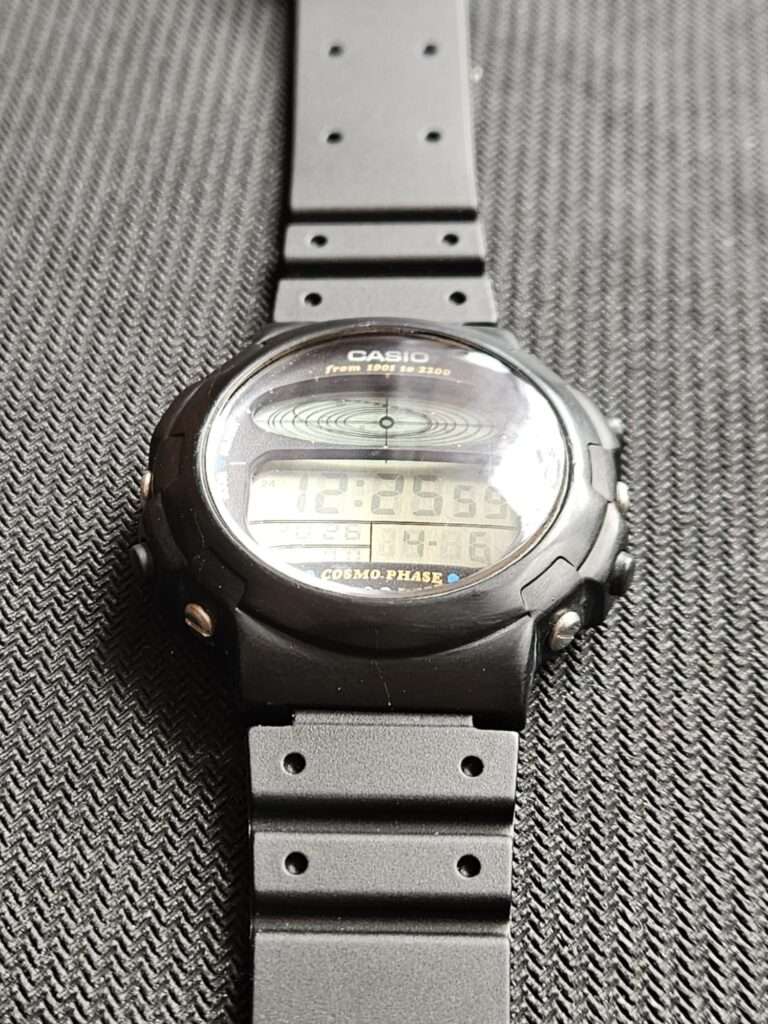
The lugs are solid and correctly shaped. The spring bars sit where they should. The crystal is clear, no trace of the deep scratches that were there before. The case has its matte finish back, even and consistent. The replacement strap fits the watch like it was always there.
The Cosmo Phase display is tracking correctly. The module never skipped a beat throughout the whole process. Michele took good care of what was on the inside, my job was just to make the outside worthy of it again.
One thing worth mentioning honestly: during the restoration I noticed micro-cracks in the case in several spots. Not something I introduced — this is what decades of UV exposure does to resin. The plastic crystallises slowly over time and eventually starts to show hairline fractures.
Those cracks won’t get better on their own. And if the case takes any stress — a knock, a tight strap swap, even regular daily wear, they can go deeper. At that point, there’s no coming back.
My honest advice: put it on the shelf. The CGW-50 Cosmo Phase is a legendary piece and this one has already had a full life. If you want to wear it, save it for special occasions, but handle it carefully and keep it out of direct sunlight. Resin this old doesn’t forgive much. It would be a shame to lose a Cosmo Phase to a crack that could have been avoided.
Want Your Vintage Casio Restored?


This CGW-50 is one example of the restorations I do. I restore vintage Casio watches for collectors around the world. You can see more of my previous projects here: 👉 casiorestore.com/projects-restorations
I work internationally and shipping is not a problem. I have already completed restorations for collectors from the UK, Italy, Sweden, Ireland, Spain, France, and more. Every project is discussed individually, so we always agree on the scope and price before starting. 🛠️
The process is simple:
- Write to me on Instagram: @vintage.casio.restore
- Or send me an email: vintagecasiorestore@gmail.com
- Describe the problem with your watch
- Send clear photos
- Tell me your country
If your Casio deserves a second life, I will be happy to help. 👍

Daniel is the person behind Vintage Casio Restore, a project dedicated to restoring and documenting vintage Casio digital watches from the 80s and 90s. Based in Poland, he combines technical precision with a passion for retro design, bringing forgotten models back to life and sharing their stories online.Outside the workshop, Daniel works in a digital agency, managing SEO and content strategy for technology clients, blending his professional experience with his love for classic tech and design.
Leave a Reply