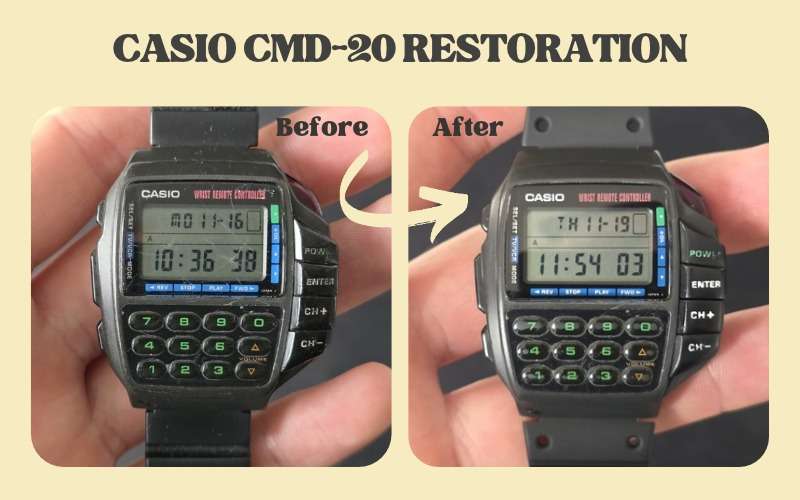
This Casio CMD-20 (module 1134) came from Hungary in working order, but with deep scratches and a chip in the resin case. I filled the damage with super glue, sanded the case to a matte finish, polished the acrylic crystal, and refinished the steel case back in two evenings.
One day, I was browsing Vinted in the evening and found a freshly listed Casio CMD-20. I bought this watch for my $4 watch flipping project, where I buy undervalued vintage watches, restore them, sell them, and fund each next purchase only with the profit from the previous sale. I knew that the CMD-20 is a rare model and that it does not show up for sale often. The seller from Hungary described the watch as technically working, so I bought it with the plan to refresh the outside.
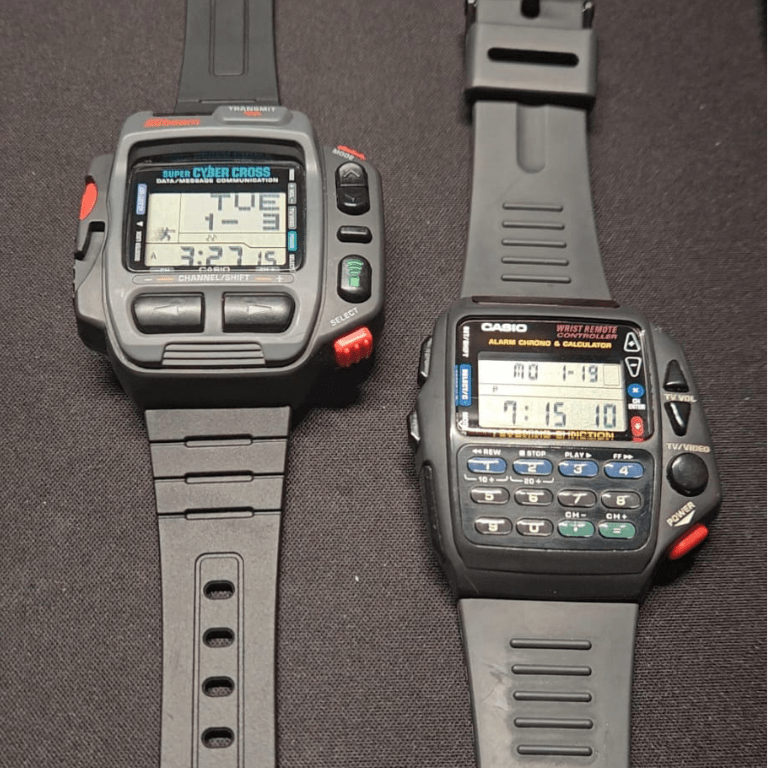
About a week and a half later, the package reached my workshop in Rzeszów. The Casio CMD-20 is a wrist remote control from the early 1990s. Casio made the CMD-20 in a short run between the CMD-10 and the CMD-30, and collectors find it harder to get today than the later CMD-30B or CMD-40. ⌚
Casio CMD-20 Restoration at a Glance
| Detail | Casio CMD-20 |
|---|---|
| Model | Casio CMD-20, wrist remote control (early 1990s) |
| Module | 1134 |
| Battery | CR2032 (original battery kept, 3 V on the multimeter) |
| Bought from | Seller in Hungary, via Vinted |
| Condition on arrival | Fully working; deep scratches on the resin case, acrylic crystal, steel case back, and calculator keys; a chip of missing resin on the front of the case |
| Key repairs | Super glue fill of the chip and deep scratches; dry sanding of the case from 400 to 2500 grit; matte finish with a melamine sponge; wet sanding of the crystal from 800 to 7000 grit and Polywatch; case back refinished with 600 to 1000 grit and a one-direction brushed finish; button lettering refilled with acrylic paint |
| Parts replaced | Strap (new Casio SDB-500 strap) |
| Parts kept original | Module 1134, LCD, battery, acrylic crystal, steel case back, case back gasket |
| Transit time | About a week and a half |
| Work time | Two evenings |
What Did the Casio CMD-20 Look Like When It Arrived?
The Casio CMD-20 arrived fully working, but with deep scratches on the resin case, the acrylic crystal, the stainless steel case back, and the calculator keys. The front of the resin case also had a chip where a piece of plastic was missing.
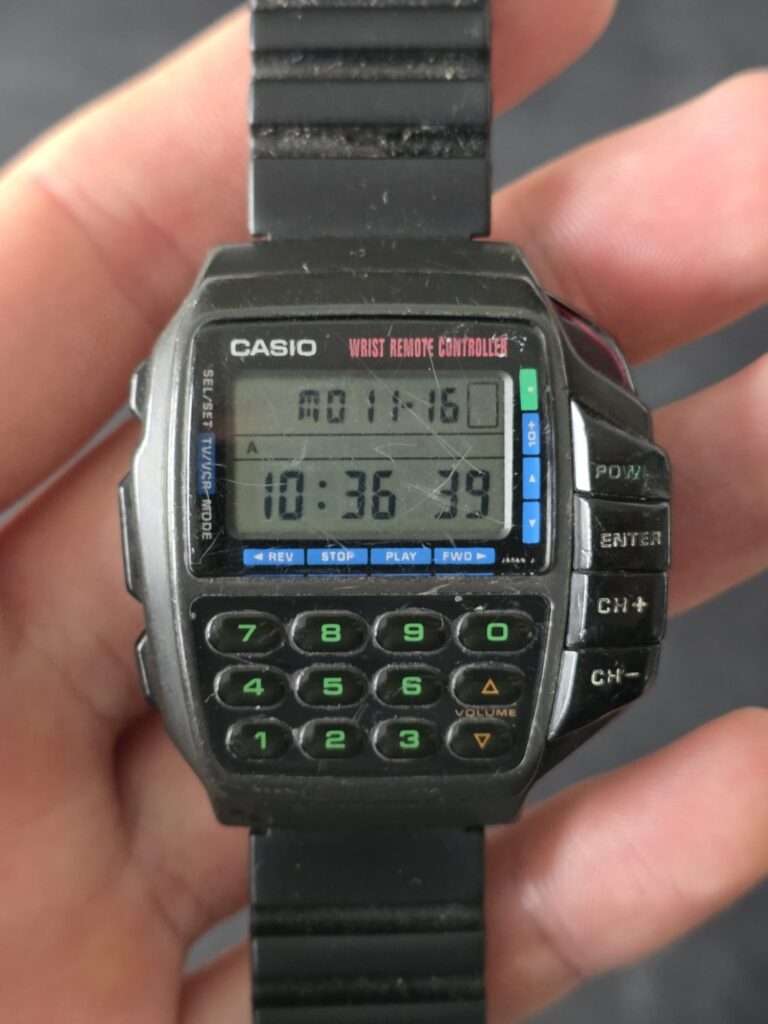
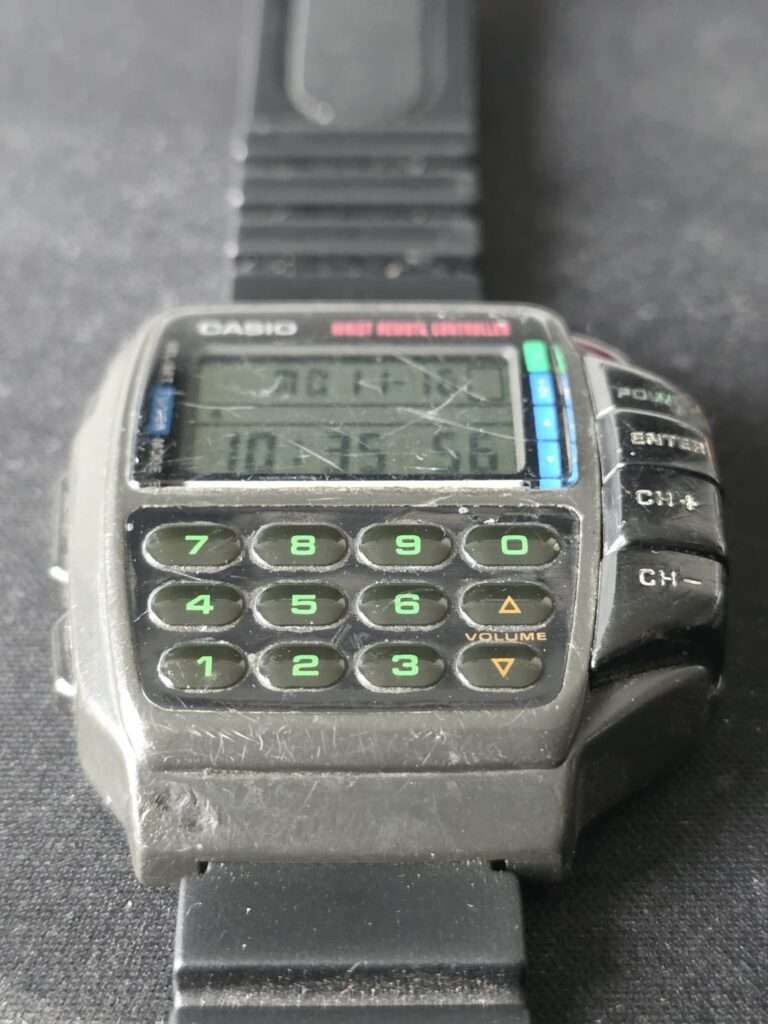
First, I tested every function of the CMD-20: timekeeping, the alarm, the chronograph, the calculator, the infrared remote, and all buttons. Everything worked. Then I measured the CR2032 battery with my multimeter. The battery still gave 3 V, so I left it in the watch.
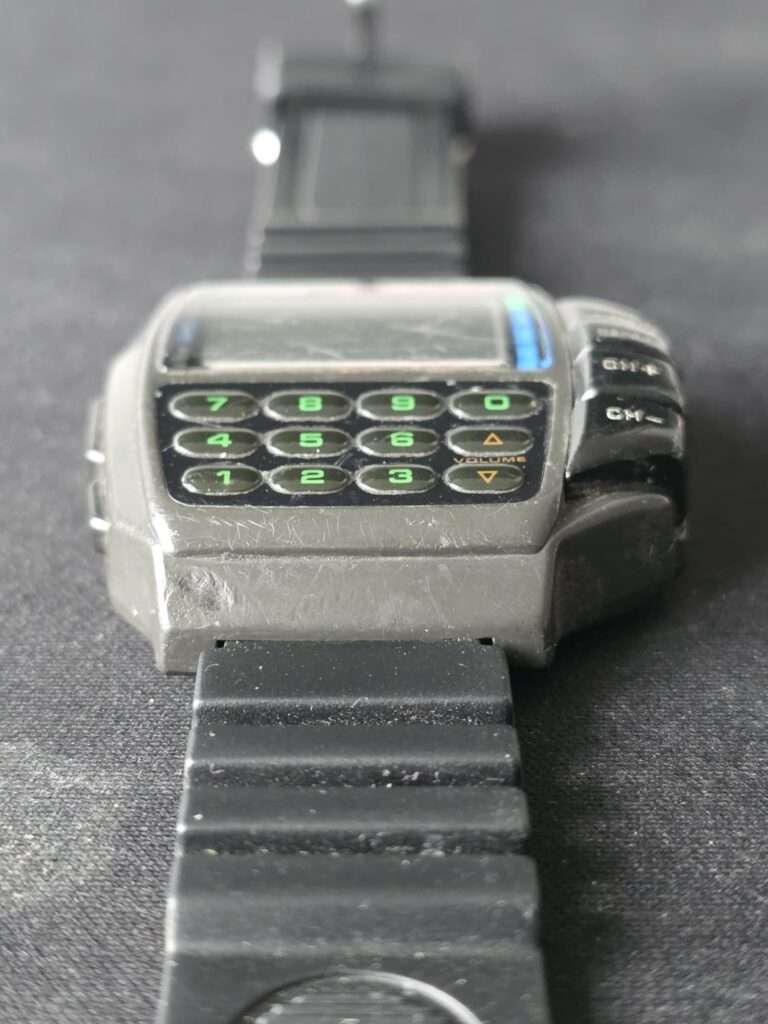
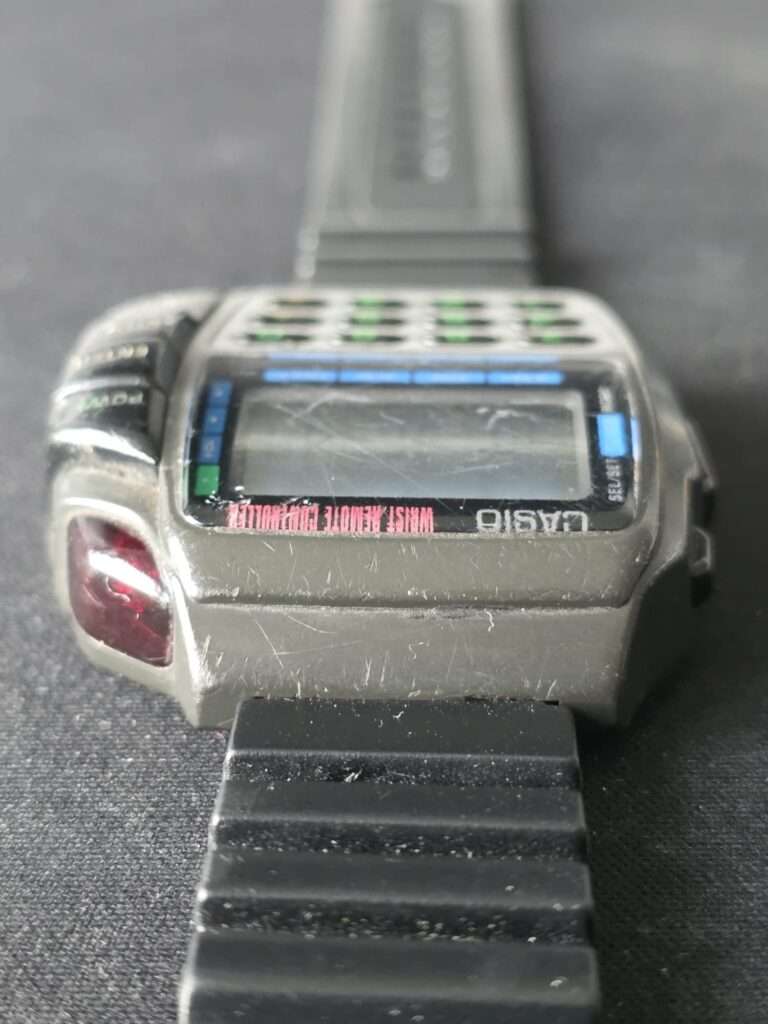
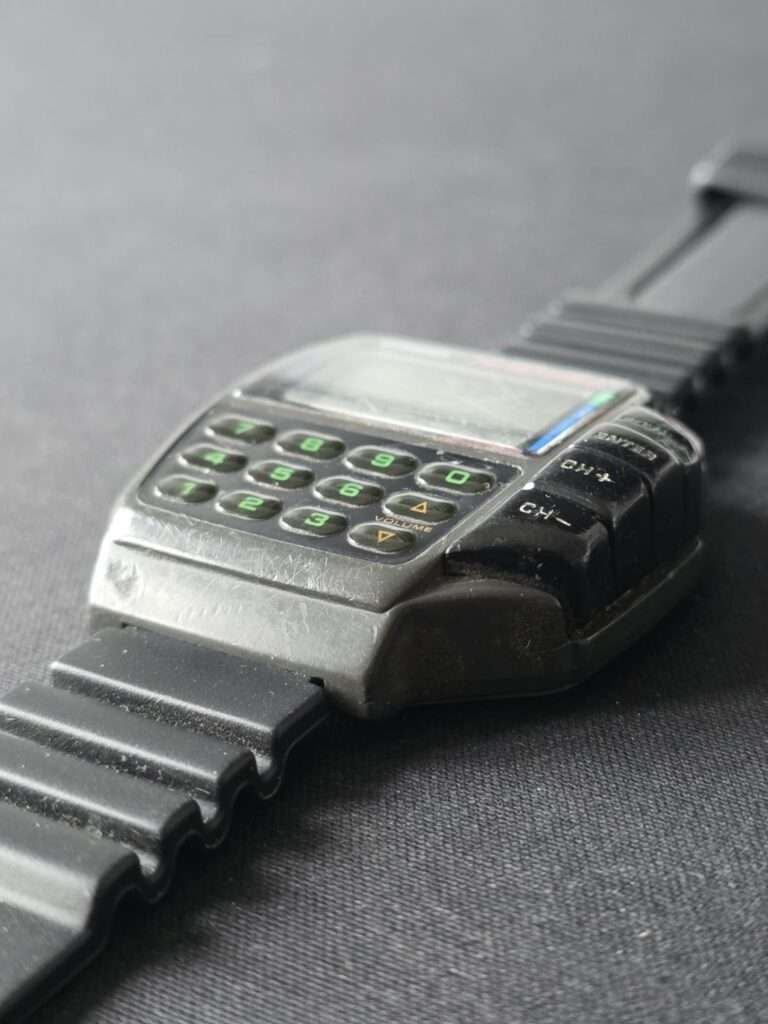
Because the electronics of the CMD-20 worked, I did not open or clean module 1134. This restoration was cosmetic: the case, the crystal, the calculator keys, the case back, and the strap.
Casio CMD-20 – Restoration Process
The Casio CMD-20 restoration had seven steps: disassembly and cleaning, filling the chip, refinishing the case, sanding the keys and repainting the button labels, polishing the crystal, refinishing the case back, and reassembly with a new strap.
Step 1: Taking Apart and Cleaning the CMD-20 Case
I started by removing module 1134 and taking the old strap off the CMD-20 case. Then I cleaned the resin case with a wet wipe and tweezers. I did not soak the case in water, because the calculator keypad on the CMD-20 is glued in place, and I did not want the keypad to come loose.
Step 2: Filling the Chip in the CMD-20 Resin Case
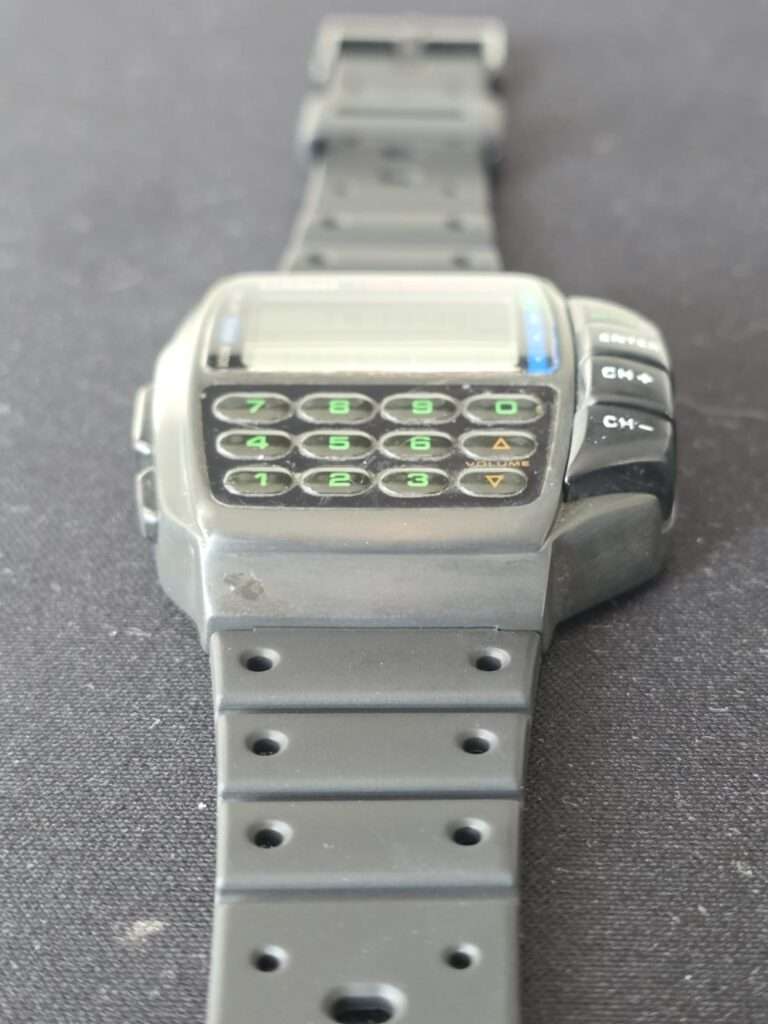
The chip on the front of the CMD-20 case needed filling before any sanding. I used the super glue method: I applied cyanoacrylate glue in several layers until the glue filled the missing resin. After the glue cured, I filed the excess down with a 400 grit sanding stick and then moved up through finer grits until the repair was flush with the case surface.
Step 3: Refinishing the CMD-20 Case to a Matte Finish
I used the same super glue method on the deeper scratches in the CMD-20 case. With a thin pin, I placed tiny drops of glue directly into each scratch, so the glue filled it from the inside.
After the glue cured, I dry sanded the CMD-20 case through these grits: 800, 1000, 1200, 1500, 2000, and 2500. I stopped at 2500 grit on purpose, because the CMD-20 case should have a matte finish, not a high gloss.
To finish the CMD-20 case, I worked the surface with a white magic eraser (melamine sponge), both wet and dry. The melamine sponge gave the resin an even satin finish.
Step 4: Sanding the Keys and Repainting the CMD-20 Button Labels
The calculator keys on the CMD-20 had deep scratches. While the watch was taken apart, I sanded the scratches out of the keys with sanding sticks.
After sanding, I refilled the paint in the lettering on the CMD-20 buttons with acrylic paint: white on three buttons and a greenish color on the power button. I brushed a thin layer of paint over each button, waited about three minutes, and scraped the excess off with my fingernail. The paint stayed only inside the recessed lettering, so the button surfaces are clean and the labels are easy to read again.
Step 5: Polishing the CMD-20 Acrylic Crystal
The acrylic crystal of the CMD-20 got the same super glue treatment first. I filled the deepest scratches with tiny drops of cyanoacrylate glue, applied with a thin pin.
After the glue cured, I wet sanded the CMD-20 crystal through these grits: 800, 1000, 1200, 1500, 2000, 2500, 3000, 4000, 5000, and 7000. The coarse papers removed the excess glue and leveled the repairs with the crystal surface. Each finer paper then removed the marks left by the previous one, until the repaired spots blended into the rest of the crystal.
Finally, I polished the CMD-20 crystal with Polywatch on a felt pad. Polywatch gave the acrylic back its clarity and a smooth, glossy finish.
Step 6: Refinishing the CMD-20 Stainless Steel Case Back
The stainless steel case back of the CMD-20 had deep scratches across the surface. I removed them with a Parkside rotary tool and abrasive paper discs from a Dremel-type accessory set from Amazon, working through 600, 800, and 1000 grit.
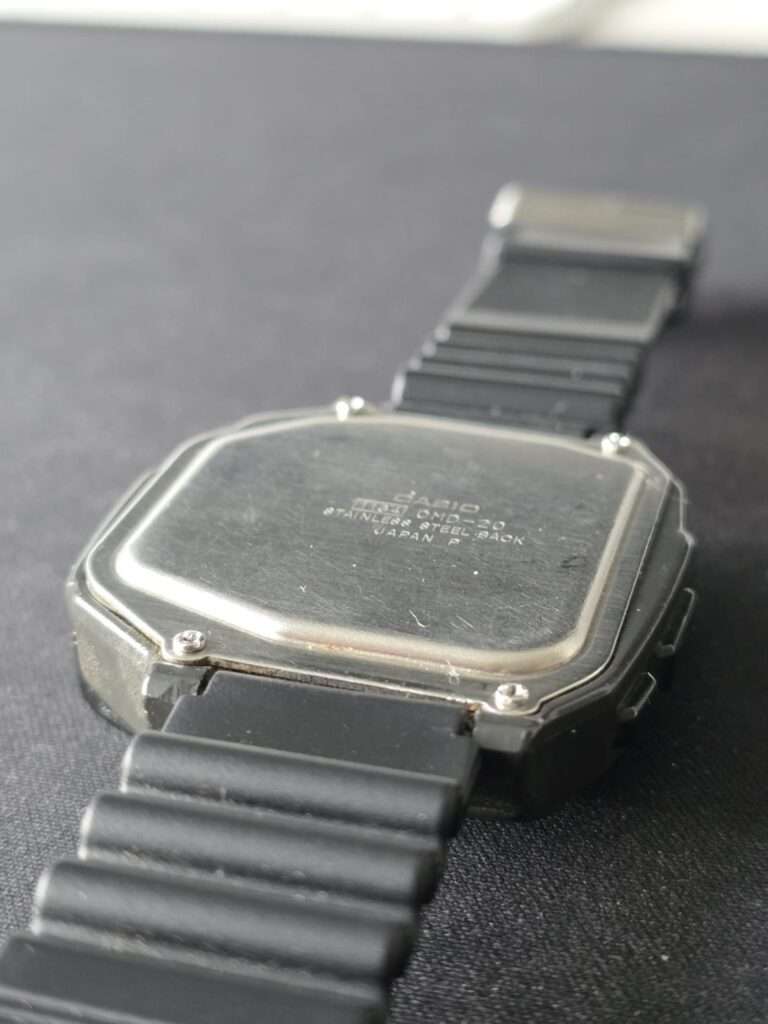
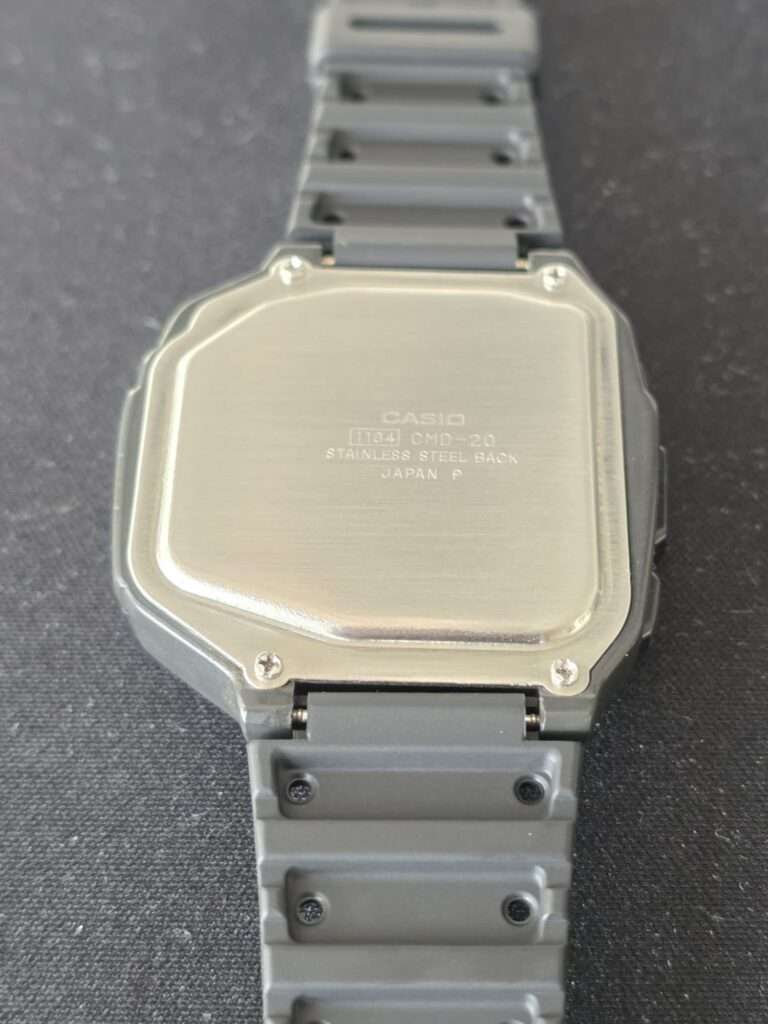
To restore the original brushed finish on the CMD-20 case back, I put 1000 grit paper on a flat surface and slid the case back across the paper in one direction. This brought back the straight, one-direction factory finish.
Step 7: Case Back Gasket and New Strap for the CMD-20
The case back gasket of the CMD-20 was in good condition, so I kept it. I degreased the gasket and lubricated it with fresh silicone grease before closing the case.
The original CMD-20 strap is hard to find today. I had a new strap from a Casio SDB-500 in my workshop, and it fits the CMD-20 case perfectly, so I fitted the SDB-500 strap. Finally, I put module 1134 back into the case and closed the CMD-20. 🔧
The Casio CMD-20 After Restoration
After two evenings of work, the Casio CMD-20 has a clean matte resin case, a clear acrylic crystal, smooth calculator keys, repainted white and green button labels, and a fresh brushed finish on the steel case back. The chip on the front of the case is filled and sanded flush with the surface. Timekeeping, the alarm, the chronograph, the calculator, and the infrared remote all work, and the new Casio SDB-500 strap sits tight on the case.
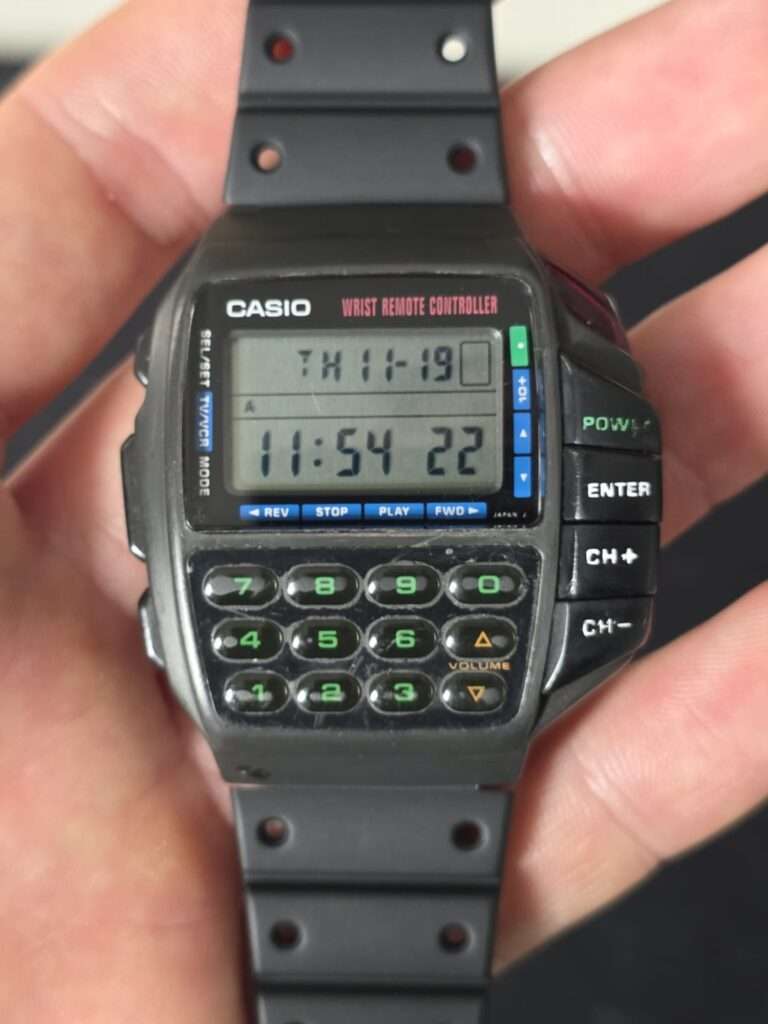
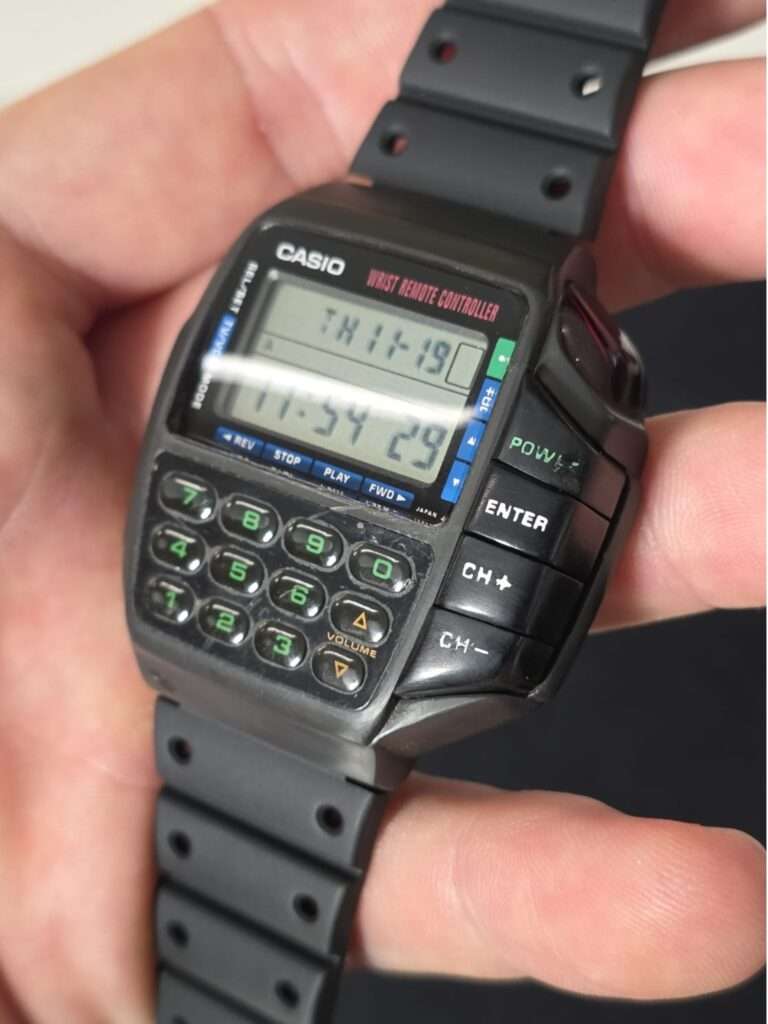
One honest note about this CMD-20: the strap is not the original CMD-20 strap. Original straps for this model are very hard to find, so the new SDB-500 strap is a practical replacement that fits the case. The CR2032 battery is also the one that came with the watch, because it still measured 3 V.
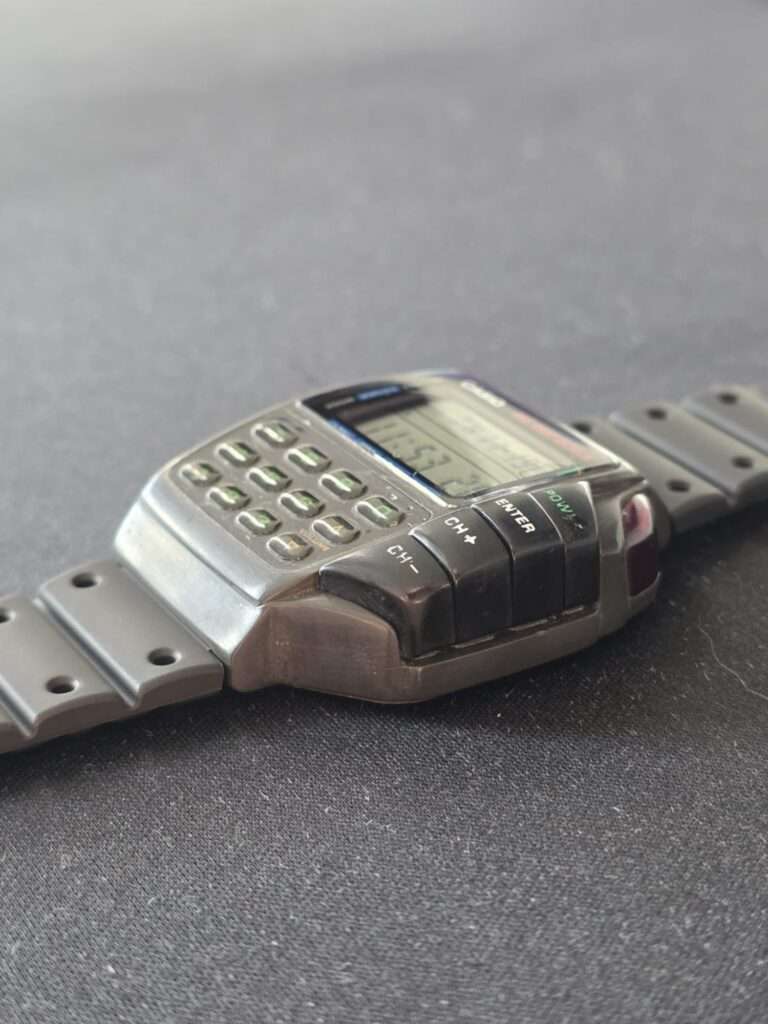
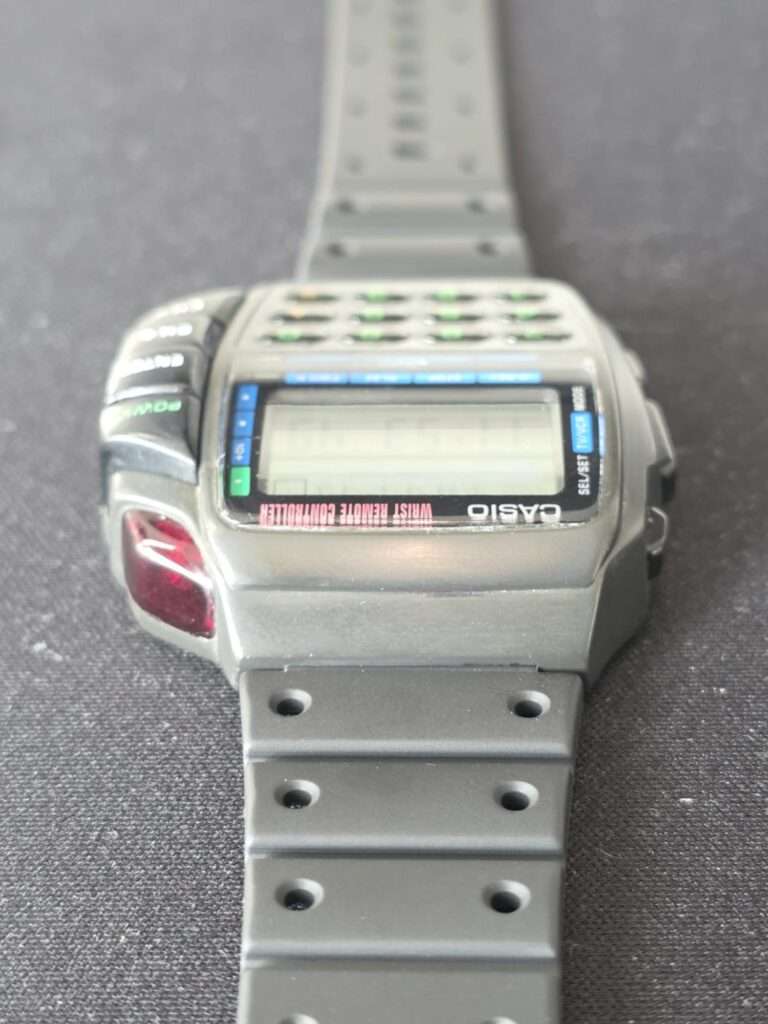
The CMD-20 was a satisfying project for me, because a rare wrist remote rarely comes up for sale, and this one only needed cosmetic work to look right again. 😄 This CMD-20 now goes up for sale as the next chapter of my $4 watch flipping project.
Want Your Vintage Casio Restored?
This Casio CMD-20 is one example of the restorations I do. I restore vintage Casio watches for collectors and enthusiasts around the world, everything from straightforward cleanups to more complex repairs like filling a chip in a resin case with super glue or wet sanding deep scratches out of an acrylic crystal from 800 to 7000 grit.
You can see more of my previous projects here: 👉 casiorestore.com/projects-restorations
I work with collectors across Europe, as well as in Canada and the United States. I have already completed restorations for collectors from the UK, US, Scotland, Sweden, Ireland, Spain, France, and more.
How Does a Casio Restoration with Me Work?
- You write to me. Tell me your country and the watch model, describe the problem, and send clear photos.
- I send you a quote. Every project is discussed individually. I send you a quote in a private message, based on the scope of work, and I also tell you the shipping costs.
- You ship the watch. When you decide to go ahead, I send you instructions on how to ship the watch to me.
- I restore the watch. The restoration takes one to two weeks from the day your watch arrives at my workshop. 🛠️
- You see the result first. When the work is done, I send you photos of the finished watch. You pay only after the work is done and you have seen the photos.
- I ship it back. I send your watch back as soon as I receive the payment, with DHL within Europe or FedEx to the US and Canada. 📦
This way, we always agree on everything before I start.
You can contact me here:
- Instagram: @vintage.casio.restore
- Email: vintagecasiorestore@gmail.com
If your vintage Casio deserves a second life, I will be happy to help. 👍

Daniel is the person behind Vintage Casio Restore, a project dedicated to restoring and documenting vintage Casio digital watches from the 80s and 90s. Based in Poland, he combines technical precision with a passion for retro design, bringing forgotten models back to life and sharing their stories online.Outside the workshop, Daniel works in a digital agency, managing SEO and content strategy for technology clients, blending his professional experience with his love for classic tech and design.
Leave a Reply