The story of this Casio TS-200 (White) started on a Facebook group called The Casio Vintage Club. Someone tagged me under a post where a collector from Sweden was selling a larger lot of Casio watches from the 80s and 90s. All of them were not working. Most were in average condition.

For many people, it was just a box of dead watches. For me, it looked like a great opportunity 😅. I chose six models that caught my attention, sent an offer, and we quickly made a deal. The package arrived fast, and the work could begin ⌚.
This is the last watch from that lot. Restoration 6 out of 6. I already restored the black version of the TS-200 before, so I knew what to expect from this model. But the white version came in much worse shape. UV damage, a chipped panel, a wrong strap, and a case that had turned from white to deep yellow. This one needed more work, and it got it.
What was the initial condition of the watch?
At first look, the Casio TS-200 (White) was in pretty bad shape. The resin case was originally white, but years of UV exposure turned it deep yellow. Almost orange. It was one of the worst cases of UV discoloration I have seen on this model.
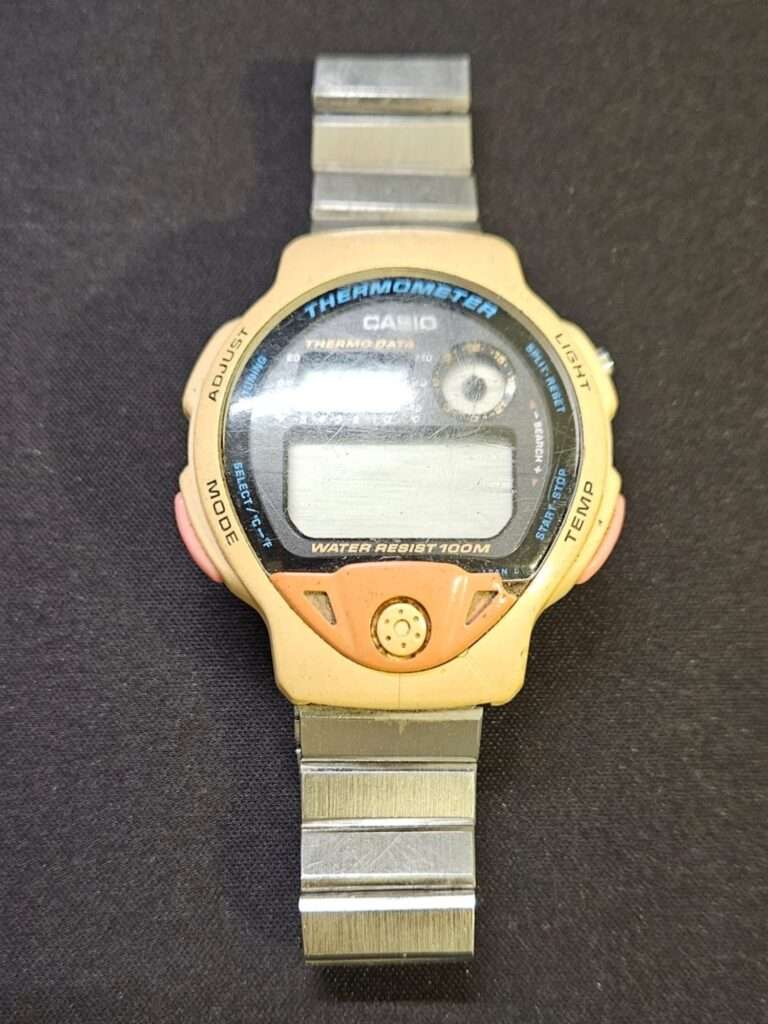
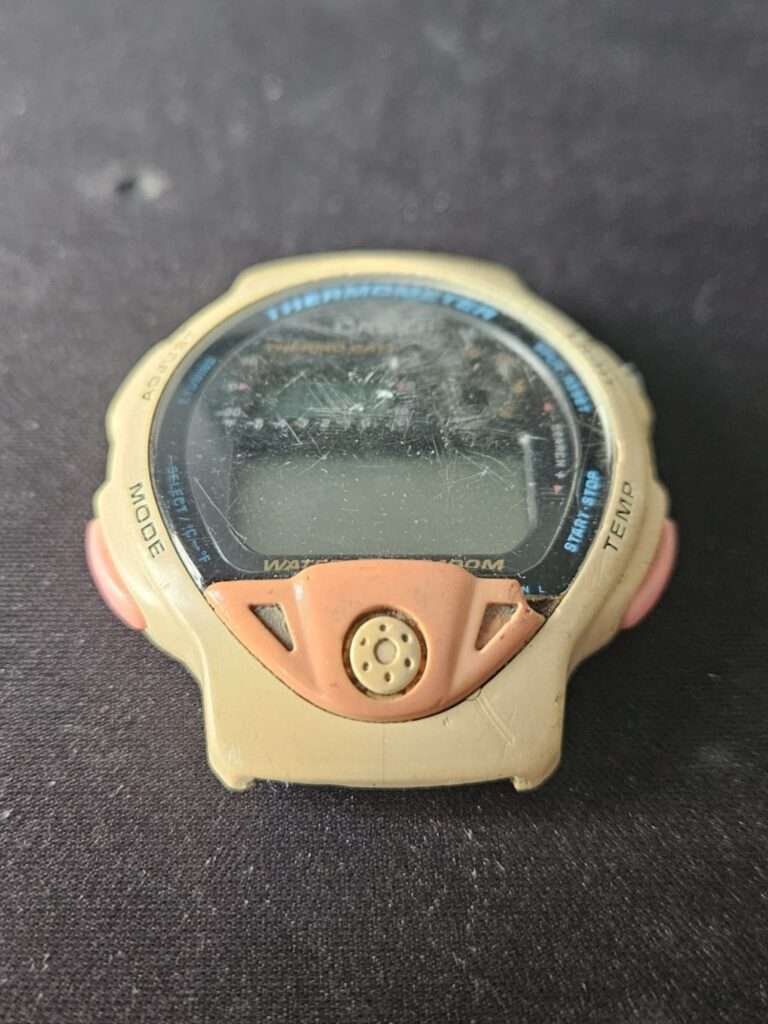
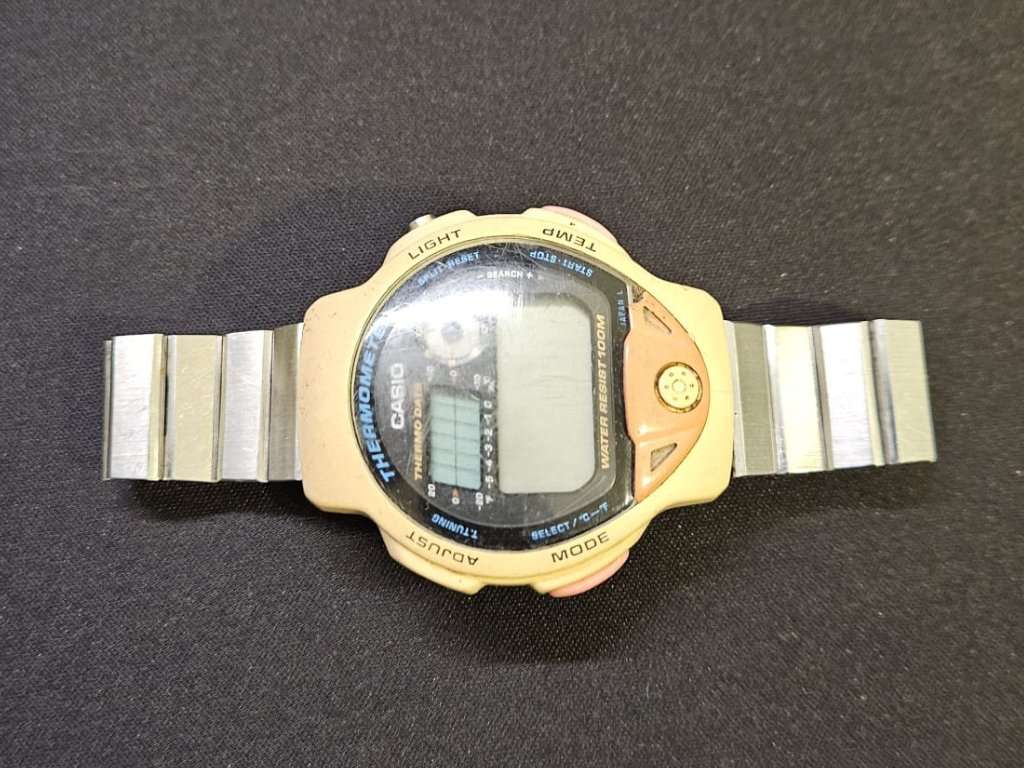
The front sensor panel had two problems. First, the color. It faded from the original pink to orange, again from UV damage. Second, a small piece of the panel was chipped off. This is actually a known weak point on the TS-200. The panel sits in a spot where it can catch on a jacket or hoodie sleeve when you put it on. Over the years, that causes damage 😅.
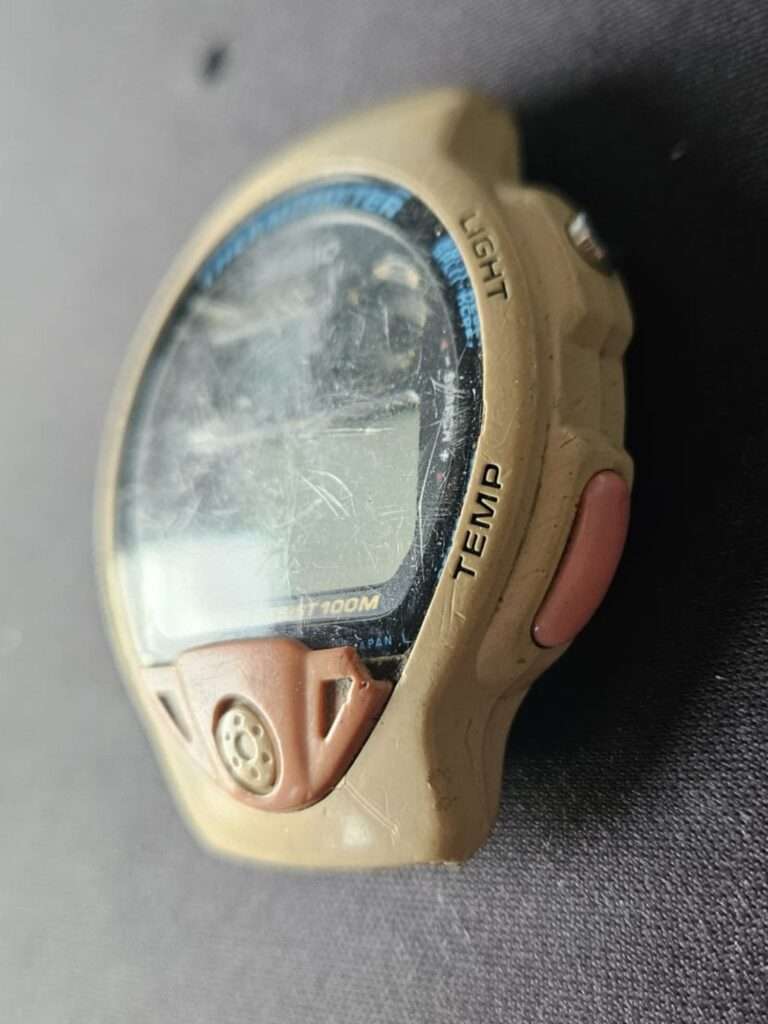
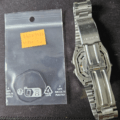
On top of that, someone had fitted a metal bracelet to the watch. The TS-200 originally came with a rubber strap. The metal bracelet did not belong there, and it looked wrong.
The watch was also dirty and not working.
Does the module still work? First power test
Before any cosmetic work, I always check the module first 🔧. There is no point sanding a case if the electronics are dead.
I opened the caseback and found an original battery inside, Made in Japan. This is always a good sign. It usually means the watch was never opened before. No corrosion, no surprises inside.
I replaced the battery and performed a standard AC reset. The module came to life immediately. Display showed 12:00, all segments visible, all buttons working. The temperature sensor responded too 👍.
The outside needed serious work. But the inside was perfect.
Here’s the Restoration Process section:
Restoration process
Once I confirmed the module was working, I could focus on the case and all the cosmetic problems 🛠️. This restoration had more steps than usual, mostly because of the UV damage and the chipped panel.
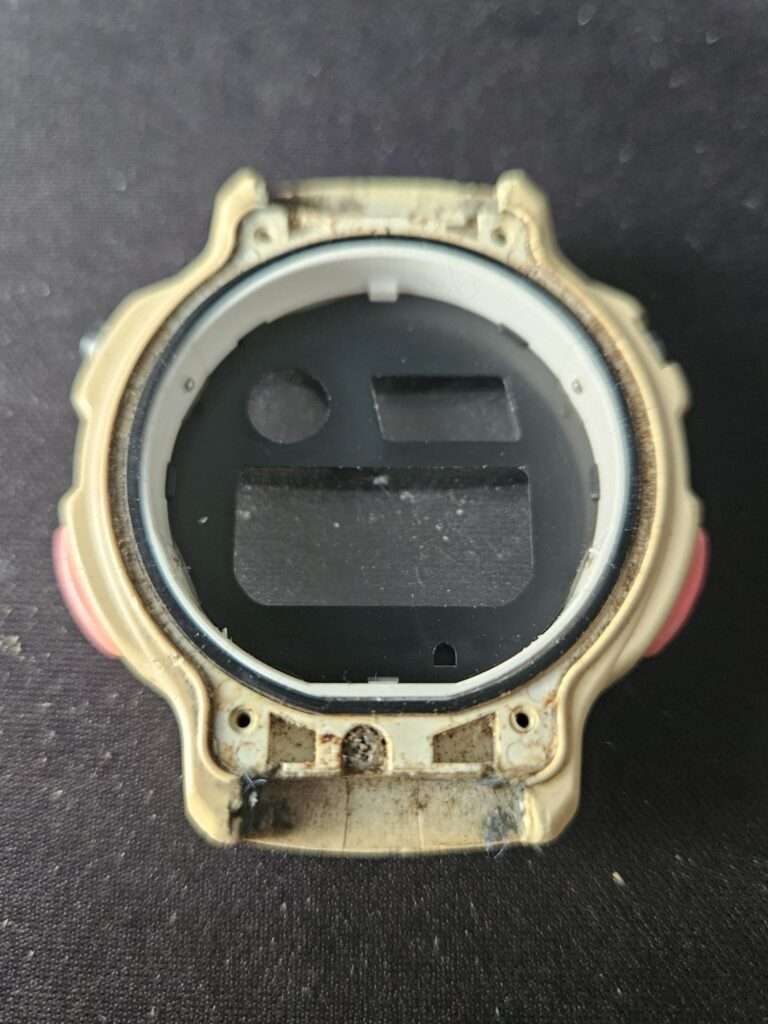
Step 1: Case disassembly
I fully disassembled the watch. Buttons, panels, every small part came off. This is important before any whitening or sanding. You do not want oxidant cream or sandpaper touching parts it should not touch.
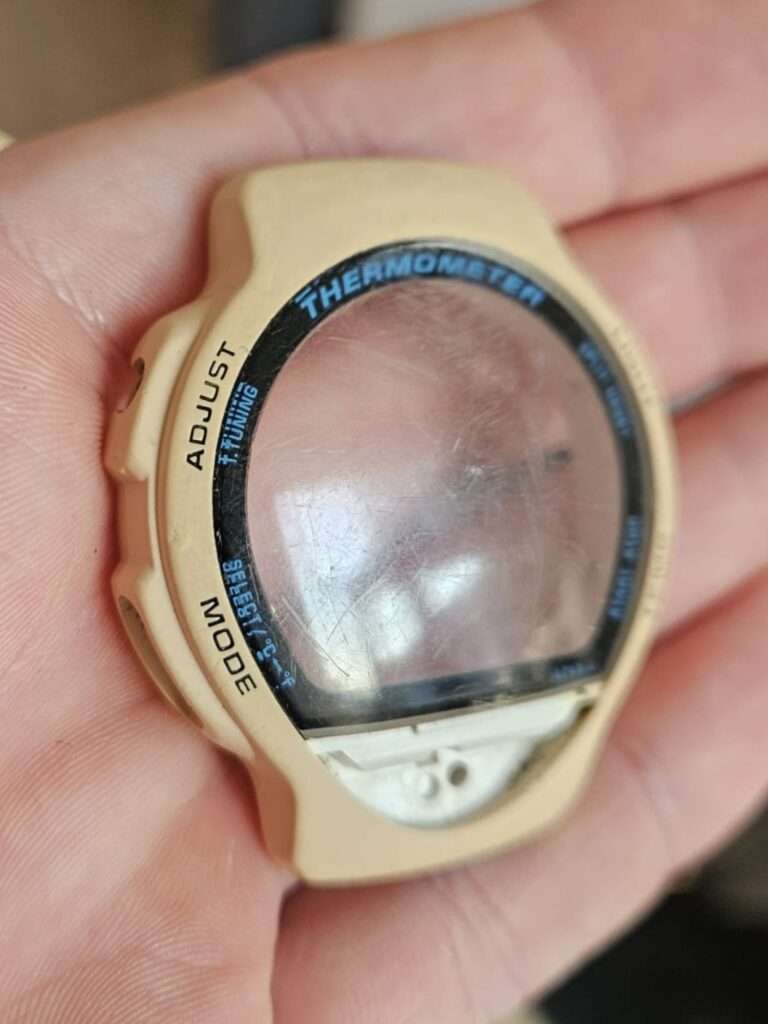
Step 2: Whitening the case (UV + oxidant method)
The yellowed case needed retrobrite treatment. I applied 12% oxidant cream to the case and the white plastic panel piece. Then I wrapped everything in cling film and placed it on the windowsill.
It was winter, so the UV light was weak. The case stayed on the window for nearly two full days. After that, the result was clear. The case was white again, close to the original color 👍.
Step 3: Sanding the case and crystal
Next, I moved to sanding. I used sandpaper from 1000 to 2500 grit on the resin case. The goal was to remove scratches while keeping the original matte finish. With resin cases you have to work slowly. It is easy to overdo it 😅.
For the acrylic crystal, I went further. I sanded it from 1000 up to 7000 grit, then finished with Polywatch. This brought back full clarity without changing the shape of the crystal.
Step 4: Final case finish
To finish the case, I used a white magic sponge, first dry, then slightly wet. This step gives the resin a clean, even, matte texture that feels close to factory finish 👍.
Step 5: Rescuing the front sensor panel
The orange sensor panel needed a different approach. I wiped it carefully with solvent. The solvent dissolved the UV-damaged surface layer and revealed the original pink color underneath. After that, I polished it. The result was much better than expected 🛠️.
Step 6: Rebuilding the chipped corner
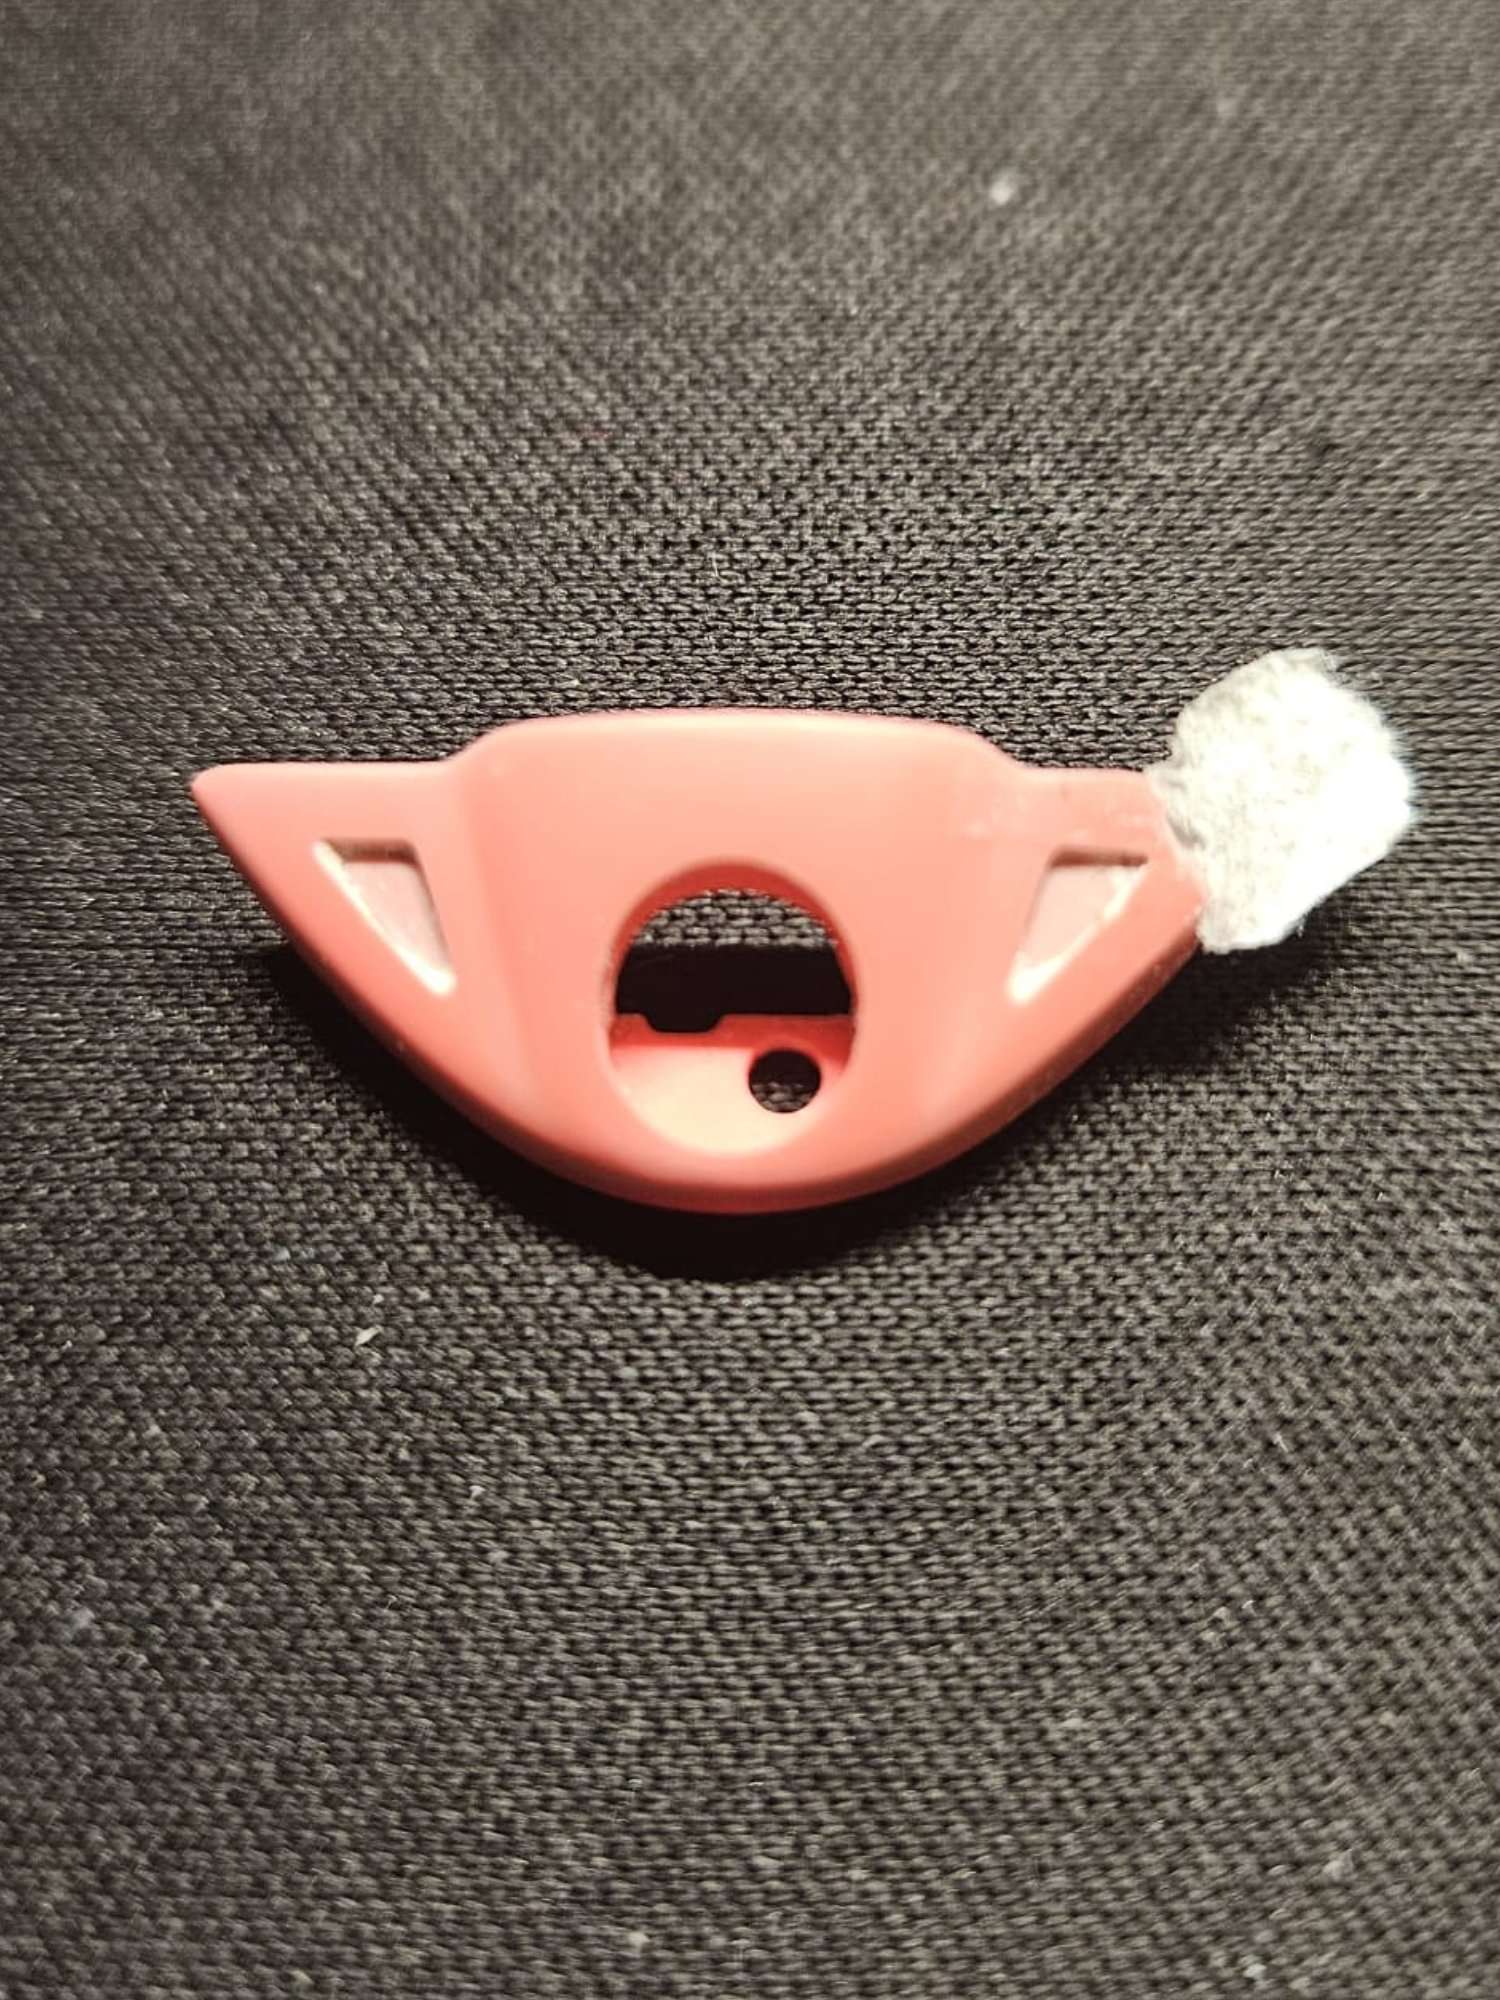
This was the most challenging part of the whole restoration. A small piece of the panel was missing, so I had to rebuild it from scratch.
I used the baking soda and super glue method. This creates a hard filler that can be shaped after it dries. I filed and sanded it down to match the original profile of the panel.
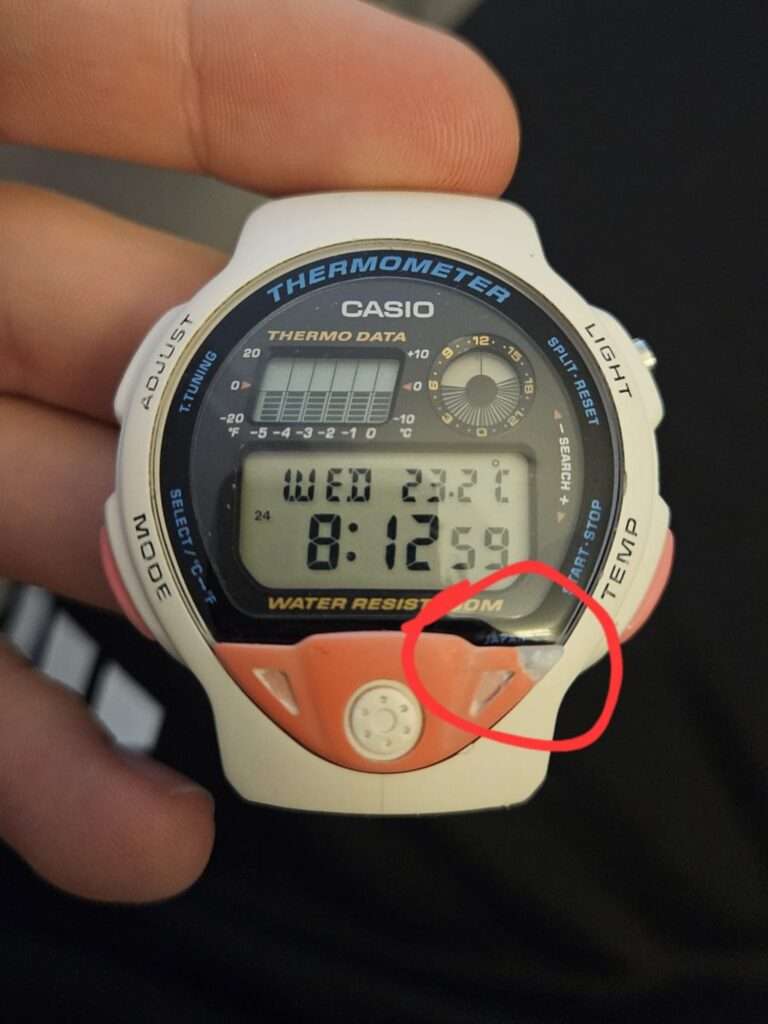
The last step was color. I painted the rebuilt piece with nail polish in the closest pink shade I could find. It looks good from normal distance. Up close, the color is slightly off compared to the original panel 😅. Not perfect, but honest. That is restoration, not magic.
Step 7: Strap selection
The metal bracelet had to go. The Casio TS-200 originally came with a rubber strap, and that is what it should wear.

Finding the original strap is very hard today. It uses uncommon dimensions, 17mm lugs and 22mm fork width. I used the same replacement solution I already tested on the black TS-200. A strap from compatible Casio models CA-56, DB-V30, DBC-V50, and LDF-40. It fits perfectly and looks correct on the watch 🔧.
The final result
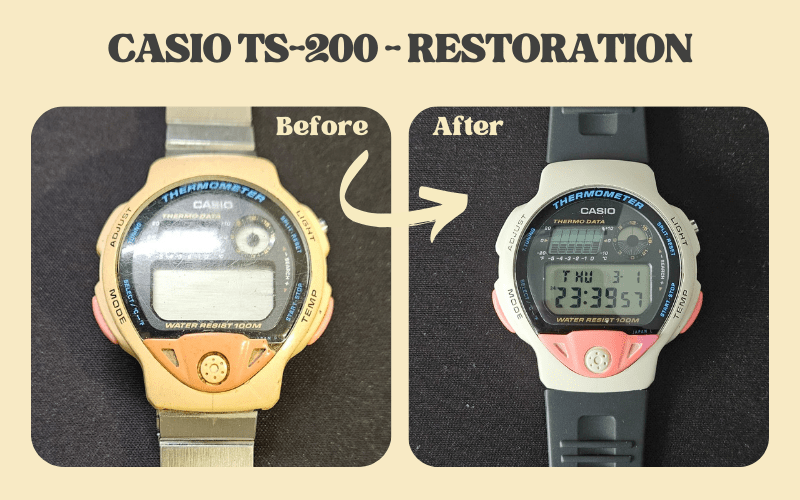
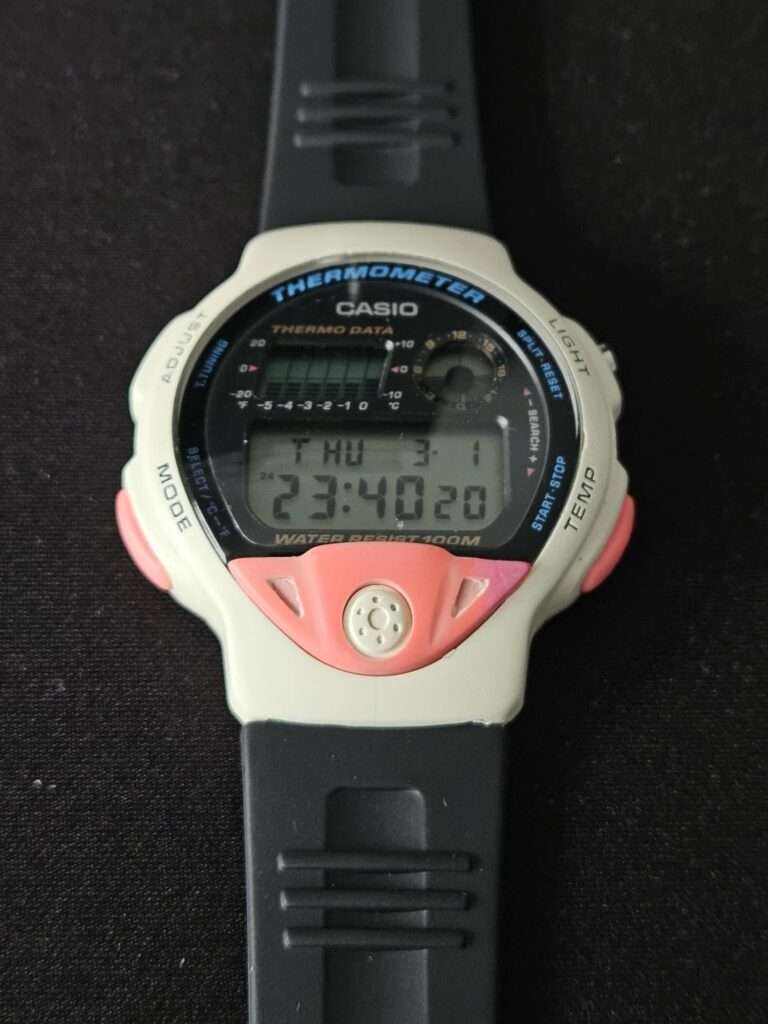
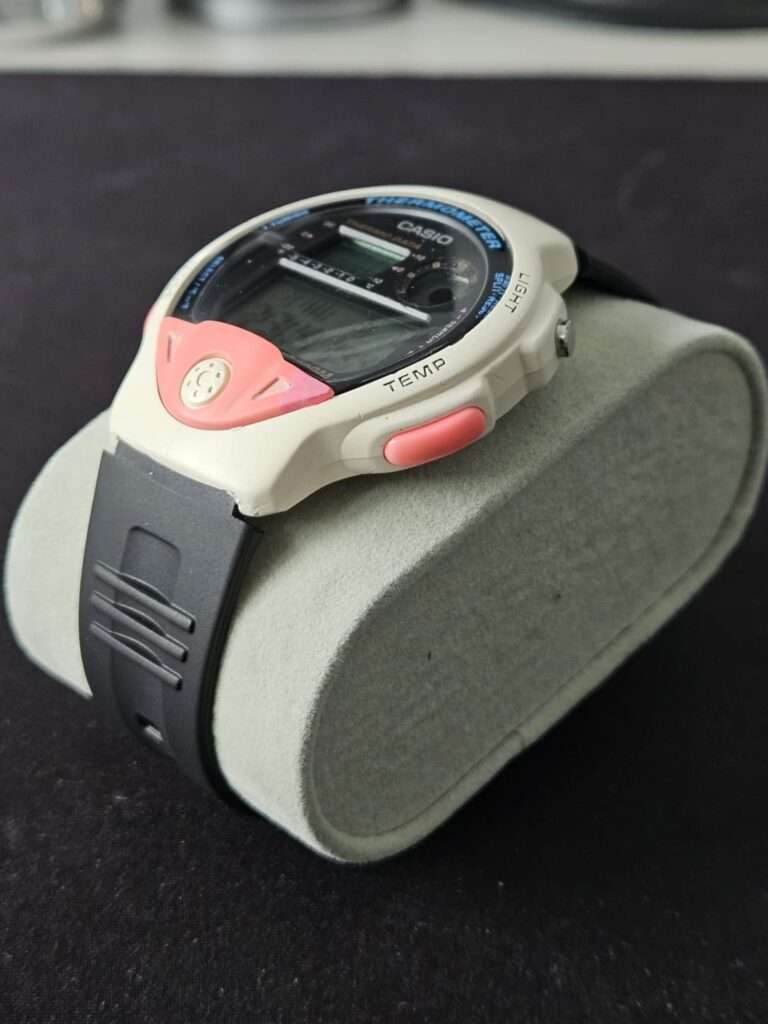
After reassembly, the Casio TS-200 looked completely different from what arrived on my bench ⌚. The case was white again, clean and even, with a proper matte finish close to the original. The acrylic crystal was clear, without haze or deep scratches. The correct rubber strap made the whole proportions feel right.
Technically, the watch works 100%. The module runs perfectly. The temperature sensor, sound, and all buttons respond exactly as they should. This TS-200 is no longer a yellowed, broken drawer piece. It is fully wearable again 👍.
The only imperfection is the rebuilt panel corner. Up close, the nail polish color does not match the original pink perfectly. It is close, but visible if you look for it. I decided to mention it because that is how restoration works sometimes. You do your best with what you have 😅.
This was restoration 6 out of 6 from the Swedish lot. All six watches are now restored and working. Looking back, buying that whole lot was one of the better decisions I made for this project. Six forgotten Casio watches, all saved.
Want your Vintage Casio restored? I also work on collector projects 👍


This Casio TS-200 is one more example of the restorations I do ⌚. I also restore vintage Casio watches for other collectors. You can see examples of my previous projects here: 👉 https://casiorestore.com/projects-restorations/
I work internationally, and shipping is not a problem. I have already completed restorations for collectors from the UK, Sweden, Poland, and France. Every project is discussed individually, so we always agree on the scope, price, and shipping before starting 🛠️.
The process is simple:
- Write to me on Instagram: @vintage.casio.restore
- Or send me an email: vintagecasiorestore@gmail.com
- Describe the problem with your watch
- Send clear photos
- Tell me your country
If your Casio deserves a second life, I will be happy to help 👍

Daniel is the person behind Vintage Casio Restore, a project dedicated to restoring and documenting vintage Casio digital watches from the 80s and 90s. Based in Poland, he combines technical precision with a passion for retro design, bringing forgotten models back to life and sharing their stories online.Outside the workshop, Daniel works in a digital agency, managing SEO and content strategy for technology clients, blending his professional experience with his love for classic tech and design.
Leave a Reply